-
Mar, Thu, 2021

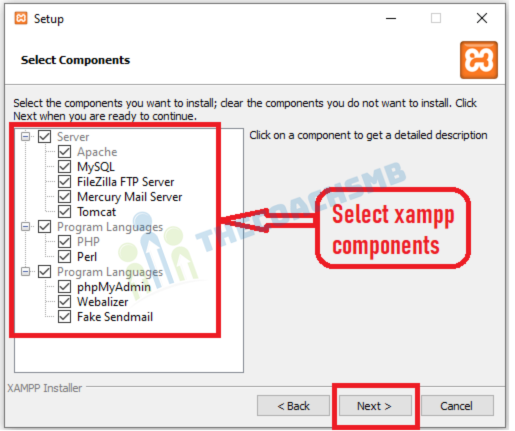
Install Magento 2.4.2 on Windows – 6 Steps using XAMPP, Composer
Table of Contents
With the arrival of Magento 2.4.2, things have gotten more earnestly as Magento 2 currently, requires Elasticsearch as a compulsory part.
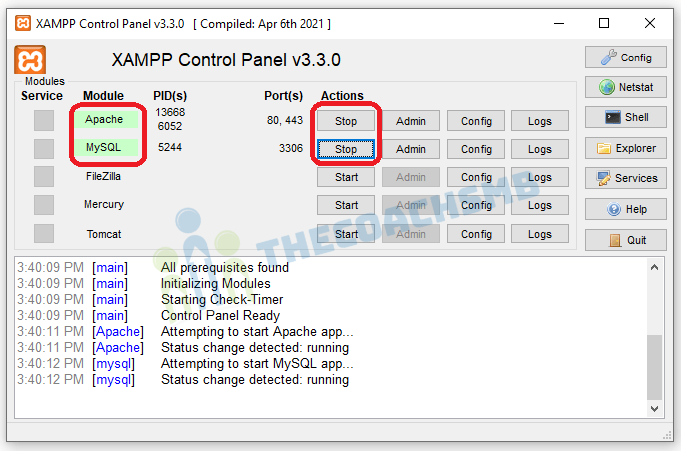
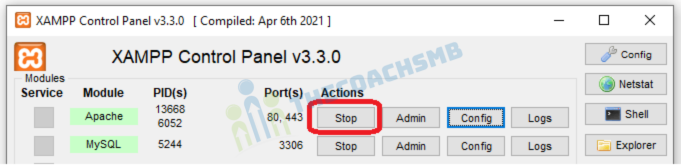
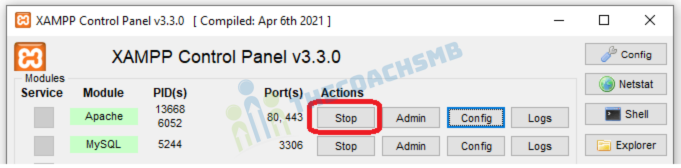
Now open XAMPP and start Apache and Mysql, green color of Apache and MySQL indicates that its been started successfully.
COMPOSER
Now we will install Composer on localhost.
Composer is a library management tool in PHP (Dependency Management), this tool saves us a lot of time with the necessary packages that your project needs to use, you just need to declare it, Composer will automatically download the code of the libraries through a community server.
>Download Composer Windows version here: https://getcomposer.org/Composer-Setup.exe
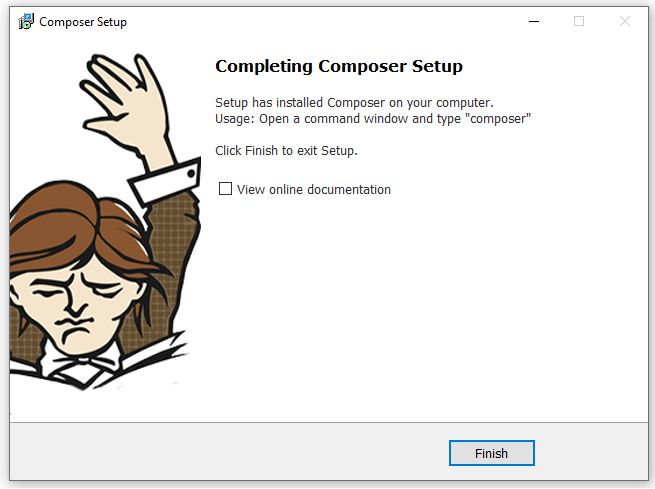
Now we will verify if Composer was successfully installed by opening Windows Command Promp and type composer . If the command prompt screen returns this outcome > Composer was installed properly
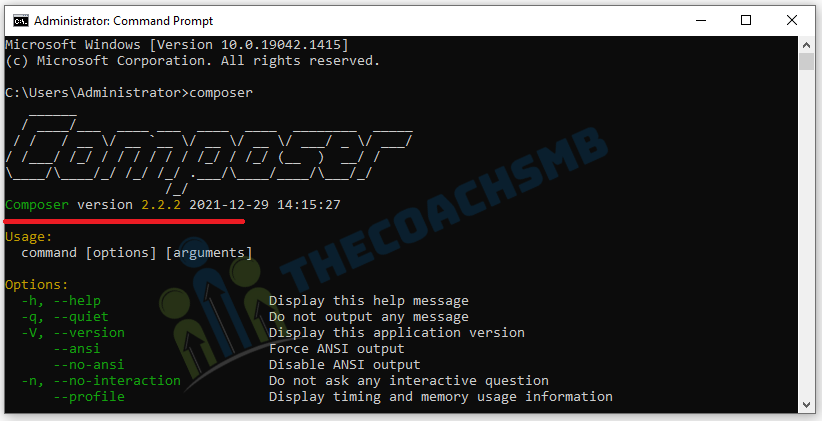
Check current composer version 2.2.2.
Step 2: Install elasticsearch on windows OS
Elasticsearch is now a required application to install Magento 2.4. During installation process, the system will verify if Eleasticsearch was installed and configured properly. If there’s something wrong with Elasticsearch verification, the installation process will stop.
Download Elasticsearch for Windows here: Click Here To Download Elasticsearch here
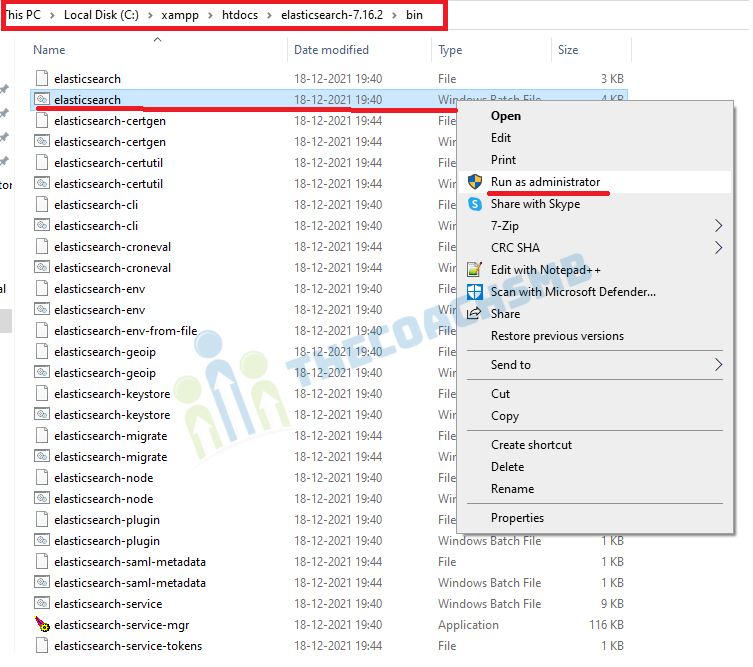
Next, unzip archived file at the “C:\xampp\htdocs\” as shown below and go to \elasticsearch-7.16.2\bin
Right click on elasticsearch.bat and select run as administrator
Leave this window running on background
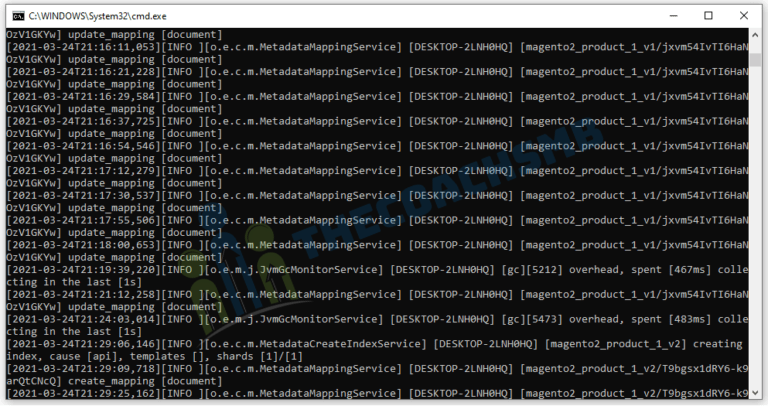
To check if Elasticsearch is running on your system, in your browser type: localhost:9200
If you see this result page => Elasticsearch is running properly

Quick tip: You can quickly open php.ini on Xampp interface with this button
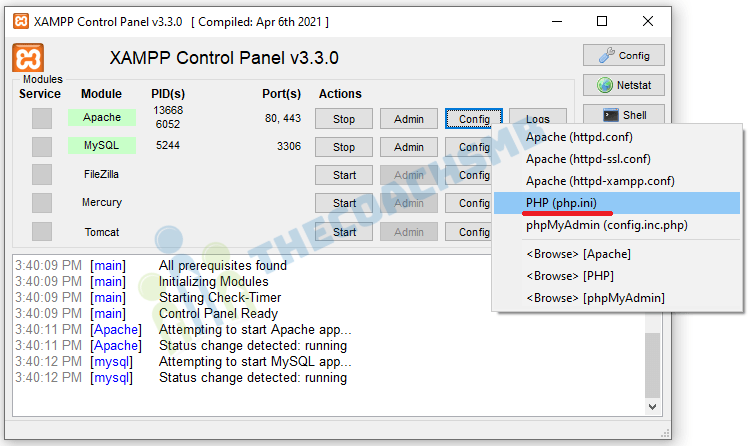
The other extensions are enabled by default after we install Xampp, so we don’t need to include them here. Remember to save files before exiting.
Configure php settings
In php.ini file, search and change the following values as below
max_execution_time=18000
max_input_time=1800
memory_limit=4G
These values will keep the installation go properly without interruption.
Finally, restart apache to apply php settings by click on apache Stop and Start button on XAMPP
Step 4: Create database for Magento 2
Before we process the installation, we have to create a database for Magento 2 website to store all settings related to products, catalog, users, store configuration….
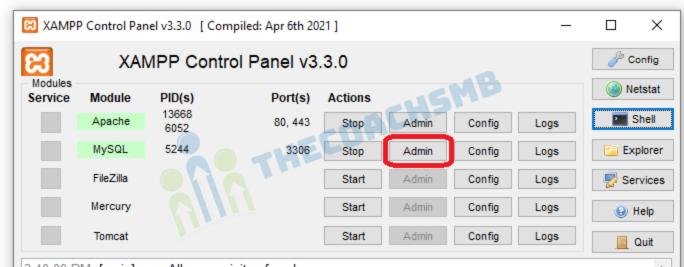
In Xampp interface, open PHPmyadmin by clicking on Admin button to open phpmyadmin (you can also type: localhost/phpmyadmin/ in browser to access phpmyadmin)
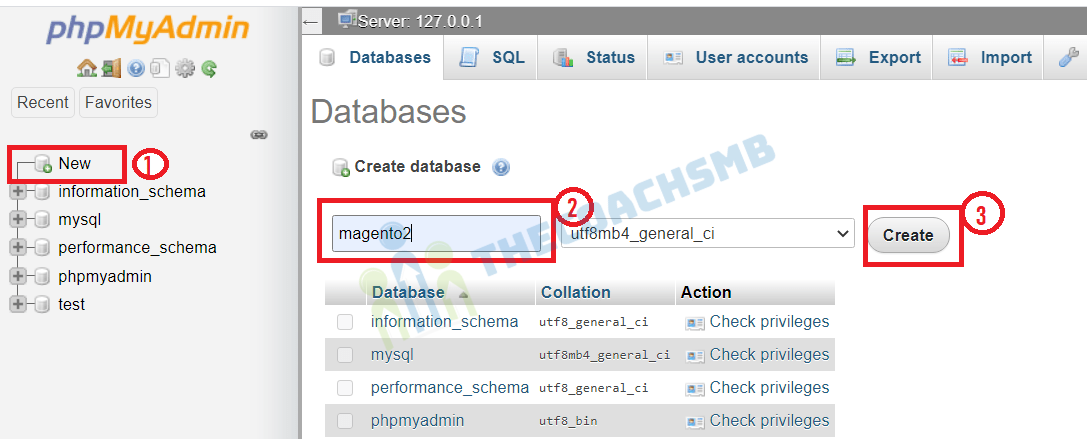
On phpmyadmin page, click on New => type database name => click on Create to create a new database. For example, I create magento2 database here
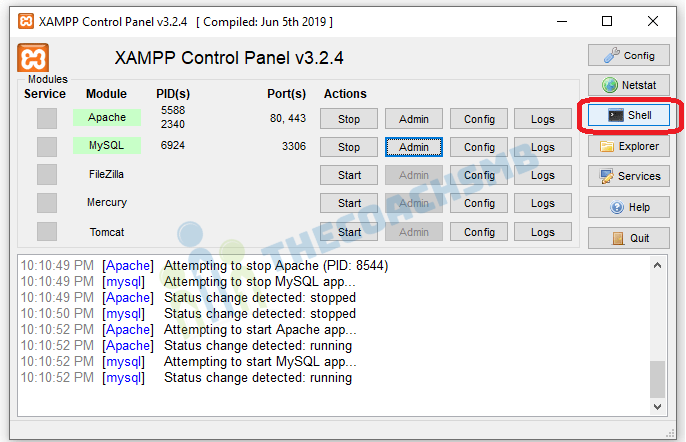
By default, Xampp does not set a password for MYSQL, so we will need to create a new root password for mysql.
On Xampp, click on Shell button to open command interface
Next, input the following command to change mysql root password
mysqladmin.exe -u root password yourpassword
Replace yourpassword with your desired password. I put root as password.
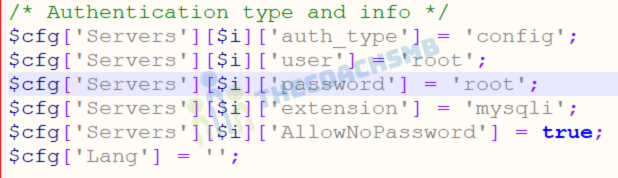
Now, to use phpmyadmin, you will also need to enter the new password. To make phpmyadmin automatically login with your new password, go to C:\xampp\phpMyAdmin\config.inc.php and insert your new password here
Step 5: Install Magento 2.4.2
Now every preparation steps are done and we can start installing Magento 2 on Localhost.
In command prompt, cd C:\xampp\htdocs,
Run below command
composer create-project --repository-url=https://repo.magento.com/ magento/project-community-edition=2.4.2 magento2
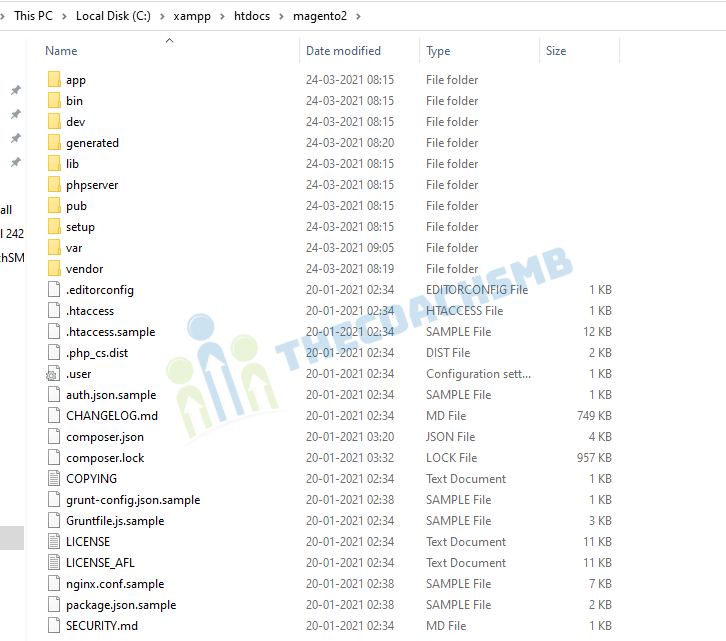
Now, see the magento2 folder with all files and folders. Now Open Command Windows and type cd C:\xampp\htdocs\magento2
Server configuration
The Magento app is served from /var/www/html/magento2/pub. The rest of the Magento file system is vulnerable because it is accessible from a browser. Setting the webroot to the pub/ directory prevents site visitors from accessing sensitive areas of the Magento file system from a browser.
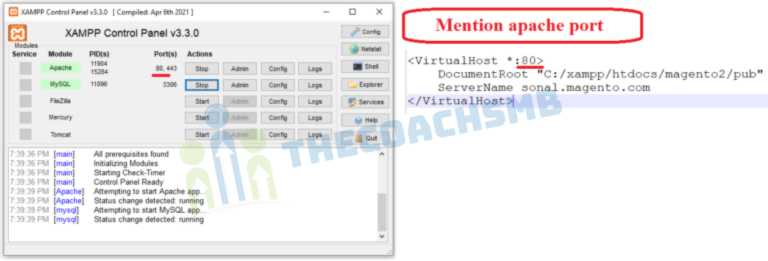
We need to set document root to pub, to do this go to file C:\xampp\apache\conf\extra\httpd-vhosts.conf
Add this content in the bottom of the file.
<VirtualHost *:80>
    DocumentRoot "C:/xampp/htdocs/magento2/pub"
    ServerName yourname.magento.com
</VirtualHost>
<VirtualHost *:80>
    DocumentRoot "C:/xampp/htdocs"
    ServerName localhost
</VirtualHost>
Where,
DocumentRoot "C:/xampp/htdocs/magento2/pub"=> location of the magento2 folder path
yourname.magento.com – this is the base url which you can set as per your wish. Ex: – sonal.magento.com
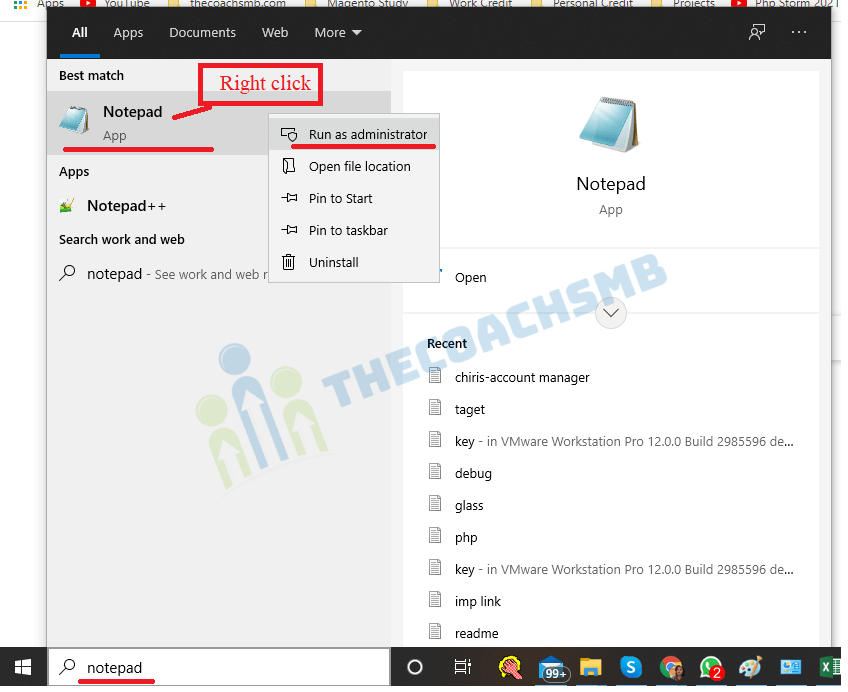
Now, Open notepad with “Run as administrator”.
lets open C:\Windows\System32\drivers\etc\hosts file in notepad and add the below line at the bottom of the file.
127.0.0.1 yourname.magento.com
Restart apache to apply php settings by click on apache Stop and Start button on XAMPP
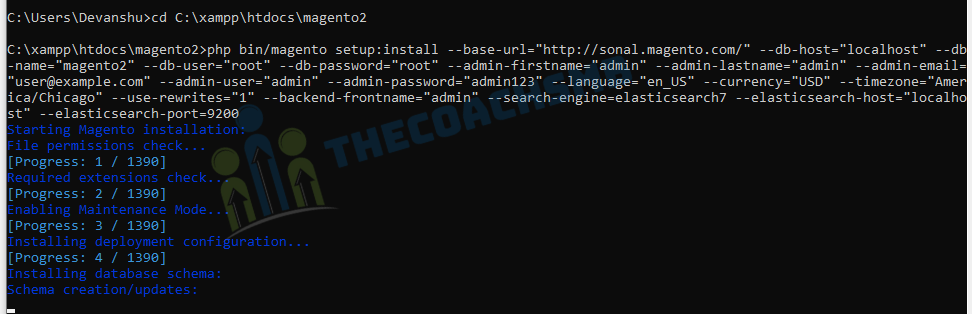
Now insert this command to start installing Magento 2 (make sure Elasticsearch, Apache, Mysql all are running before execute this command)
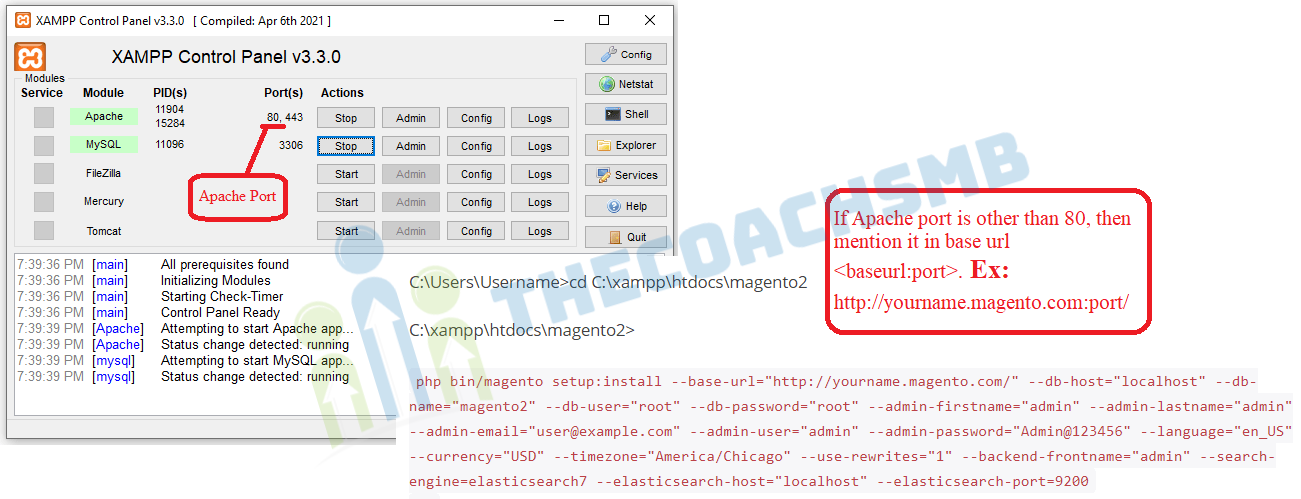
C:\Users\Username>cd C:\xampp\htdocs\magento2
C:\xampp\htdocs\magento2>
php bin/magento setup:install --base-url="http://yourname.magento.com/" --db-host="localhost" --db-name="magento2" --db-user="root" --db-password="root" --admin-firstname="admin" --admin-lastname="admin" --admin-email="user@example.com" --admin-user="admin" --admin-password="Admin@123456" --language="en_US" --currency="USD" --timezone="America/Chicago" --use-rewrites="1" --backend-frontname="admin" --search-engine=elasticsearch7 --elasticsearch-host="localhost" --elasticsearch-port=9200
In PatchApplier.php line 170:
Unable to apply data patch Magento\Theme\Setup\Patch\Data\RegisterThemes for module Magento_Theme. Original exception message: Wrong file
In Gd2.php line 72: Wrong file
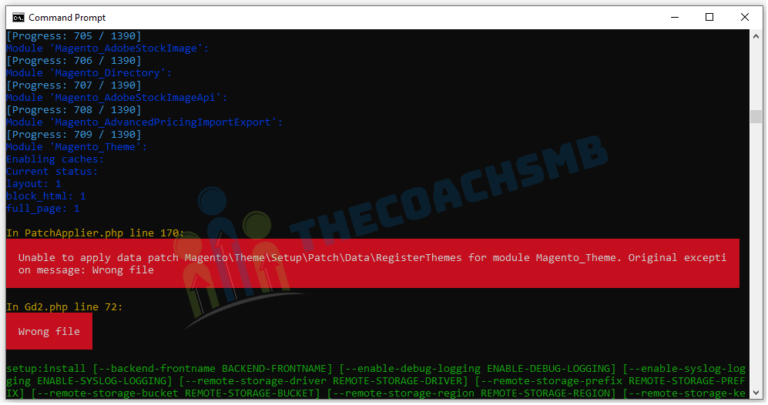
Solution: –
Here Image Adapter try opens to image files (‘open function in Gd2.php line 72). validateURLScheme function return false always because it checking ‘URL’ format but local files not valid for this format, so it returns false.
Find validateURLScheme function in vendor\magento\framework\Image\Adapter\Gd2.php file. at line 94. Replace function with this:
private function validateURLScheme(string $filename) : bool
{
          $allowed_schemes = ['ftp', 'ftps', 'http', 'https'];
          $url = parse_url($filename);
          if ($url && isset($url['scheme']) && !in_array($url['scheme'], $allowed_schemes) && !file_exists($filename)) {
              return false;
          }

          return true;
}
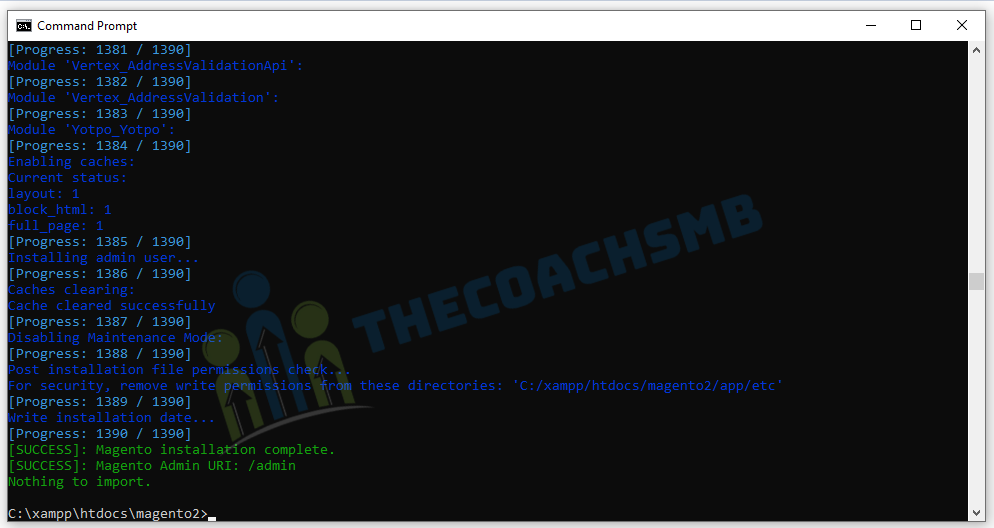
And you will get the output as shown below. It means your magento2 installation is successful. Congratulations !!
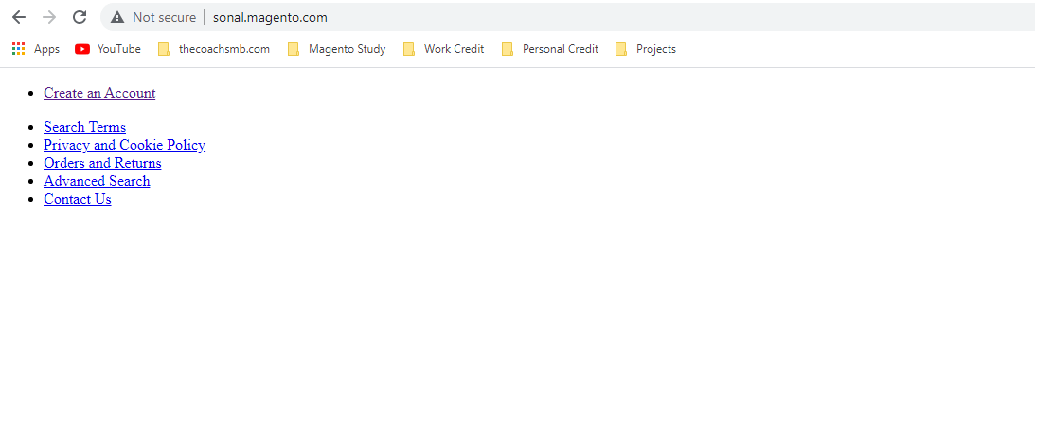
Now if you go to your browser with this URL to access Magento 2 store: http://yourname.magento.com(In my machine, I have setup to http://sonal.magento.com/) .You will probably see a blank page like this
Here’s how to fix this:
Go to: C:\xampp\htdocs\magento2\vendor\magento\framework\View\Element\Template\File
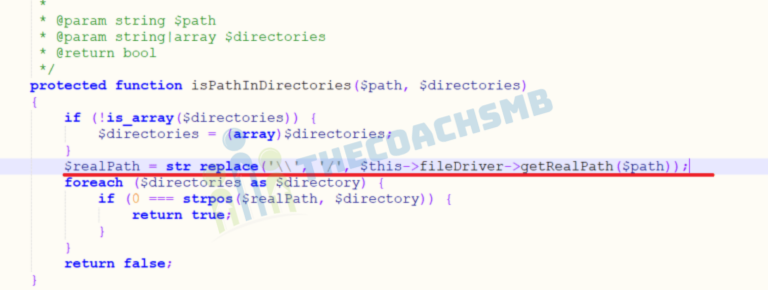
Edit Validator.php using a text editor and find this line:
$realPath = $this->fileDriver->getRealPath($path);Replace with this code:
$realPath = str_replace('\\', '/', $this->fileDriver->getRealPath($path));The new file should be like this after editting:
Save this file.
Then, Open up app/etc/di.xml in the editor,
– Find the path “Magento\Framework\App\View\Asset\MaterializationStrategy\Symlink” and replace to “Magento\Framework\App\View\Asset\MaterializationStrategy\Copy”
Save the file.
Wait for the process
php bin/magento setup:static-content:deploy -f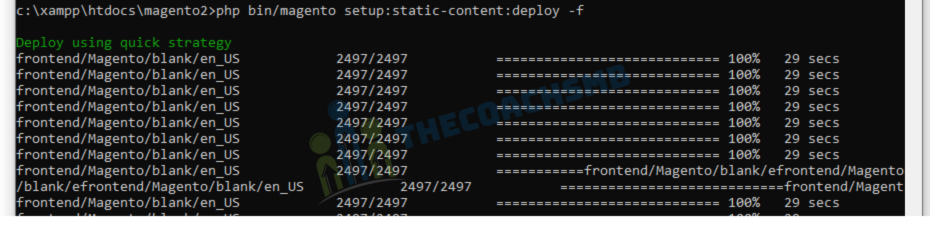
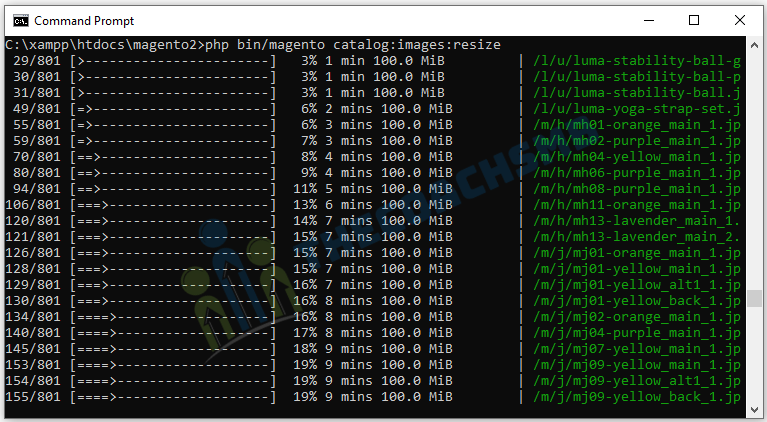
php bin/magento cache:flushThen run below command for displaying product images:
php bin/magento catalog:images:resize
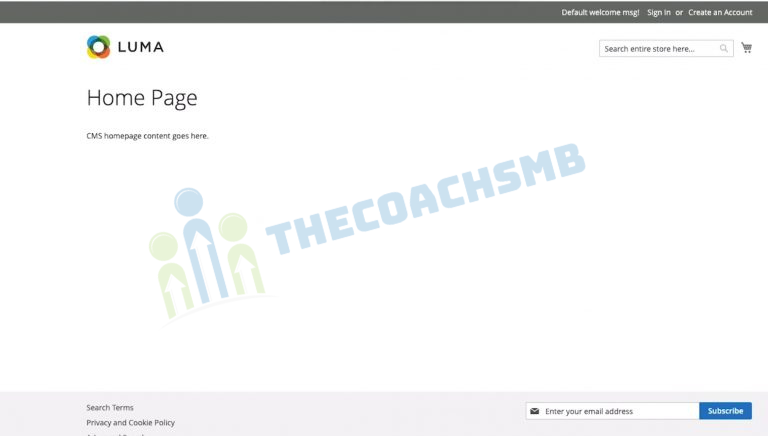
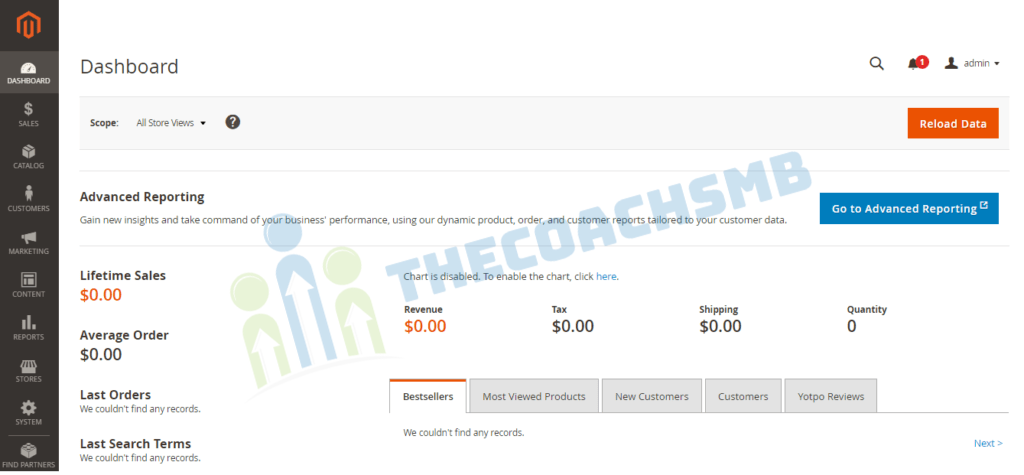
Now reload your website and you will see the your new Magento 2 website on localhost.
This is Magento 2 Home page without sample data.
This is Magento 2 Home page with the sample data.

If you haven’t installed magento 2.4.2 with sample data and now wants to do it follow below Step 5.
Step 6: Install sample data for Magento 2.4.2
Now we will deploy sample data for our new Magento 2.4.2 website on localhost. Sample data will fill your website with some products, categories and images so your website will look like this:

In command interface, issue this command to deploy sample data
php bin/magento sampledata:deploy

Once the process completes, run reindex, deploy static view files and upgrade database commands.
php bin/magento indexer:reindexphp bin/magento setup:upgradephp bin/magento setup:static-content:deploy -fFinally flush cache to apply changes
php bin/magento cache:flushWell done! refresh your website and enjoy your new Magento 2.4 installation with sample data

Admin login :-
Your Admin Url – http://yourname.magento.com/admin/
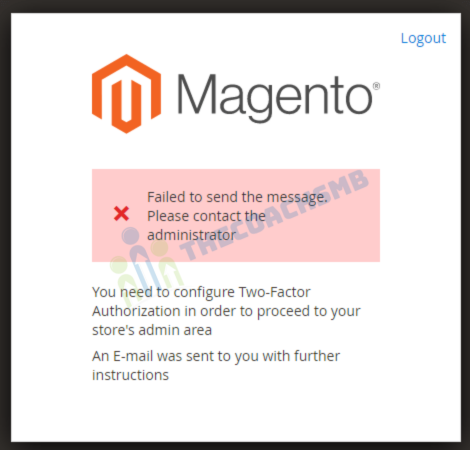
To fix this issue, open Magento 2 Command prompt and run this command
php bin/magento module:disable Magento_TwoFactorAuth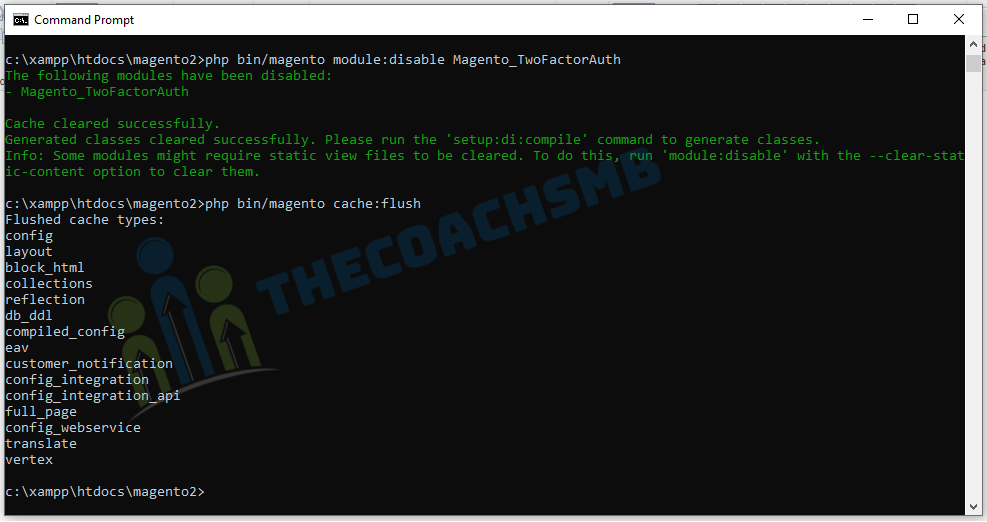
Now refresh admin page and you will be able to log in to admin dashboard normally.
You can also reach out to this below video to install magento 2 on localhost Windows using Xampp, Composer.
Hello
Your Document is super, its really help to install magento 242 with xampp,
great support
Thanks
very nice article i have setup in 40 minutes without any error smoothly.
Thanks for sharing this.
Awesome tutorial! Thanks for putting this together. I am running into a weird issue though. I have built the database and can log in via mysql commands, so it is working properly. I had to change to port 3307, other than that, everything is the same. I am getting the error below:
Database ‘magento2’ does not exist or specified database server user does not have privileges to access this database.
In InstallCommand.php line 282:
Parameter validation failed
I am logging in user as ‘root’ with password as ‘password’, I have logged into MariaDB magento2 database via ‘mysql -u root -p magento2’ and that is working properly. I have also made all of the other changes as well.
Sonal, this was wonderful.
I was able to go slowly, and between the web page and your YouTube video, make it to the end.
Also, appreciate that you made a Windows-specific version of this.
Thanks much
I have installed the magento2 without sample data but I want to install with sample data. Is there I need to reinstall it?
To install sample data, run below command:
php bin/magento sampledata:deploy && php bin/magento indexer:reindex && php bin/magento se:up && php bin/magento se:s:d -f && php bin/magento c:f
Thanks
Starting Magento installation:
File permissions check…
[Progress: 1 / 1690]
Required extensions check…
[Progress: 2 / 1690]
Enabling Maintenance Mode…
[Progress: 3 / 1690]
Installing deployment configuration…
[Progress: 4 / 1690]
Installing database schema:
In Mysql.php line 597:
SQLSTATE[42S02]: Base table or view not found: 1146 Table ‘magento.eav_entity_type’ doesn’t exist, query was: SELECT `main_table`.* FROM `eav_entity_type` AS `main_table`
In Mysql.php line 110:
SQLSTATE[42S02]: Base table or view not found: 1146 Table ‘magento.eav_entity_type’ doesn’t exist, query was: SELECT `main_table`.* FROM `eav_entity_type` AS `main_table`
In Mysql.php line 91:
SQLSTATE[42S02]: Base table or view not found: 1146 Table ‘magento.eav_entity_type’ doesn’t exist
Along with the project directory, you need database file to setup your project.
Dear Sonal.
Thanks for the tutorial. It was very helpfull.
I’ve successfully installed Magento 2 with Luma, but it seems as it doesn’t load js and css.
Best regards
Jacob
Please run below commands:
php bin/magento se:s:d -f
I successfully installed Magento 2.4. Your tutorial is great! It helped me a lot. Very straight forward, Thank you!
Very happy to hear that
Hi mam,
I have done everything but at final it is asking for authentication key warning what i have to do mam can you please help me
Please Follow this article: https://www.thecoachsmb.com/access-keys-magento2/
Hello, Thank you for your instructions, but after opening site i see this https://i.imgur.com/3T3NYze.jpeg. I was installing m2.4.3-p1 with elastic 7.9 like in requirements, and installation ended well https://i.imgur.com/xZRzNNR.jpeg, elastic working https://i.imgur.com/xn7GtSh.jpeg. And here is some other screenshots https://i.imgur.com/53Mt5Cg.jpeg https://i.imgur.com/1VJiZ5g.jpeg https://i.imgur.com/R1Zu5cz.jpeg. Could you please help? Thank you!
Please watch this video for solution : – https://youtu.be/PKh5RIcj1dg
Follow this step by step.
Thanks
Sonal
Mir Ma’am
I did same process but when i open the website I got this Error “The store will not work correctly in the case when cookies are disabled.”
Run the query:
php bin/magento setup:static-content:deploy -f
Hi,
Your work is very Good and i am learn how to setup magento 2 on windows. This website is very usefull for the learner.
And Please do the new page or video on magento 2 with pwa setup (venia theme) with windows and linux.
Thanks
imtiyaz
Thanks Imtiyaz for your valuable feedback. Sure I will create page and video on magento 2 with pwa setup (venia theme) with windows and linux.
I did all as per the steps and when I executed the last install command I get a message like this
C:\xampp\htdocs\magento2>php bin/magento setup:install –base-url=”http://nishant.magento.com/” –db-host=”localhost” –db-name=”magento2″ –db-user=”root” –db-password=”root” –admin-firstname=”admin” –admin-lastname=”admin” –admin-email=”user@example.com” –admin-user=”admin” –admin-password=”Admin@123456″ –language=”en_US” –currency=”USD” –timezone=”America/Chicago” –use-rewrites=”1″ –backend-frontname=”admin” –search-engine=elasticsearch7 –elasticsearch-host=”localhost” –elasticsearch-port=9200
SQLSTATE[HY000} [1045] Access denied for user ‘root’@’localhost’ (using password: YES)
In InstallCommand.php line 274:
Parameter validation failed
And then it stops.
Can you please help
Please recheck the “Step 4: Create database for Magento 2”.
Hi
Great tutorial!
I followed Step 4 and set the password as required for the root. But it is still giving me this error. Any other suggestions?
SQLSTATE[HY000} [1045] Access denied for user ‘root’@’localhost’ (using password: YES)
In InstallCommand.php line 274:
Parameter validation failed
Please follow the step 4. Then
enter correct details about db host, db name, db pass db user in the command.
It doesnt works completely.
Sample data for products is not loading although the images are coming up for homepage. But for products it wont come up.
Please run following command in the magento2 install directory.
php bin/magento catalog:images:resize
Thanks for a wonderful post. It was super helpful. I also have another request where I need to run this XAMPP Magento site using the public ip of my Winodws 2019 Server VM. The challenge is I also have IIS websites which I need to run in parallel with XAMPP magento sites. I can access my windows localhost using my public ip but when I try to access the magento site using port 8080 i’m not able to can you help.
Update IP address in the base url of the Magento site. To do it
You need to update the BASE URL in the table core_config_data Where path like ‘%base_url%’
I follow the article after some hiccup it successfully installed.
I stuck in hear
DocumentRoot “C:/xampp/htdocs/magento2/pub”
ServerName yourname.magento.com
when install in different port just foget to change the to new port number here as well the error leaves no symptoms feel like a dead end. finally I recovered. your article is simply awesome .kudos. please keep it up goodwork.
I have problem when run this command:
php bin/magento catalog:images:resize
Cannot resize images – product images not found
Have you installed Magento2 with sample data. If yes then only run this command.
Hello Ma’am,
The error : Could not validate a connection to Elasticsearch. No alive nodes found in your c
luster
Keep Elasticsearch running..
Finally a good tutorial that troubleshoot all issues that appears when you try to install magento on windows. Thank you very very much!!
Thank you so much for appreciating and giving feedback Oscar.
Forbidden
You don’t have permission to access this resource.
Apache/2.4.48 (Win64) OpenSSL/1.1.1k PHP/7.4.22 Server at abc.myurl.com Port 80
We need to set document root to pub, to do this go to file C:\xampp\apache\conf\extra\httpd-vhosts.conf
DocumentRoot “C:/xampp/htdocs/magento2/pub”
ServerName yourname.magento.com
paste this code at the bottom of the file.
yourname.magento.com – this is the base url which you can set as per your wish. Ex: – sonal.magento.com
Now lets edit C:\Windows\System32\drivers\etc\hosts file and add the below line at the bottom of the file.
127.0.0.1 yourname.magento.com
Restart apache to apply php settings by click on apache Stop and Start button on XAMPP
then go to app/etc/env.php, check is your url mentioned there.
First of all thank you !
The install itself went well , however when I try to open the main page “http://abc.myurl.com” I get
Forbidden
You don’t have permission to access this resource.
Apache/2.4.48 (Win64) OpenSSL/1.1.1k PHP/7.4.22 Server at abc.myurl.com Port 80
We need to set document root to pub, to do this go to file C:\xampp\apache\conf\extra\httpd-vhosts.conf
DocumentRoot “C:/xampp/htdocs/magento2/pub”
ServerName yourname.magento.com
paste this code at the bottom of the file.
yourname.magento.com – this is the base url which you can set as per your wish. Ex: – sonal.magento.com
Now lets edit C:\Windows\System32\drivers\etc\hosts file and add the below line at the bottom of the file.
127.0.0.1 yourname.magento.com
Restart apache to apply php settings by click on apache Stop and Start button on XAMPP
then go to app/etc/env.php, check is your url mentioned there.
Hi Madam
I am trying to install magento 2.4.2 on window10 using xampp php version 7.4.22
but getting error on last step
[Progress: 1309 / 1314]
Installing admin user…
In Compat.php line 1927:
This is not implemented, as it is not possible to implement Argon2i with ac
ceptable performance in pure-PHP
when i check using phpinfo i can see that sodium already enable
sodium
sodium support enabled
libsodium headers version 1.0.17
libsodium library version 1.0.17
when when i check on terminal using php -m.. i can’t the sodium here
[PHP Modules]
bcmath
bz2
calendar
Core
ctype
curl
date
dom
exif
fileinfo
filter
gd
gettext
gmp
hash
iconv
imap
intl
json
ldap
libxml
mbstring
mysqli
mysqlnd
openssl
pcre
PDO
pdo_mysql
pdo_sqlite
Phar
readline
Reflection
session
SimpleXML
soap
sockets
SPL
standard
tokenizer
wddx
xml
xmlreader
xmlrpc
xmlwriter
xsl
zip
zlib
Please help me on this issue
Follow this article:- https://www.thecoachsmb.com/troubleshoot-generally-occured-errors-in-magento-2-installation/
It’s a great tutorial no doubt at all. I’m totally new to magento but following these steps I’m able to install magento2. Now I’m facing one issue when I open my link like yourname.magento.com it’s showing me 404 error will you please help me out to resolve that error here’s screen shot of that error.
https://tinyurl.com/ygqqktuf
Thank you so much for such a great tutorial.
We need to set document root to pub, to do this go to file C:\xampp\apache\conf\extra\httpd-vhosts.conf
DocumentRoot “C:/xampp/htdocs/magento2/pub”
ServerName yourname.magento.com
paste this code at the bottom of the file.
yourname.magento.com – this is the base url which you can set as per your wish. Ex: – sonal.magento.com
Now lets edit C:\Windows\System32\drivers\etc\hosts file and add the below line at the bottom of the file.
127.0.0.1 yourname.magento.com
Restart apache to apply php settings by click on apache Stop and Start button on XAMPP
then go to app/etc/env.php, check is your url mentioned there.
Awesome tutorial, Thank you.
Would we need set mode to developer?
Yes. Here is the link to do so https://www.thecoachsmb.com/how-to-enable-developer-mode-in-magento2/
Thanks, very helpful
Thank you Anassaeb.
Magento 2.4.2 Admin Login Not Working on Localhost. Tried multiple users still facing issues.
Follow this tutorial – https://www.thecoachsmb.com/solved-admin-login-error/
Hi
Everything perfect,
Could you please tell me ‘Catalog Search’ re-index is taking too long, newer ends, how to solve this issue ?
Thanks in advance
Rafeeq
Thanks very much , perfect tutorial
Thank you so much for the feedback Ahmed Chouihi !!
I found an ‘Error 503: Service Unavailable’ when I went to my browser with this URL to access Magento 2 store: http://name.magento.com
Service Temporarily Unavailable
The server is temporarily unable to service your request due to maintenance downtime or capacity problems. Please try again later.
Please connect me via whatsapp/skype/fb messange.
Hi Sonal,
Thank you so much for this and all your articles.
They are so helpful and you covered all the points.
You have worked so hard. Really appreciate your efforts.
I have installed magento 2.4.2 successfully just because of you.
lots of love.
Great to hear that. Thank you so much Kanchan !!
I did all as per the steps and when I executed the last install command I get a message like this
C:\xampp\htdocs\magento2>php bin/magento setup:install –base-url=”http://sidharth.magento.com/” –db-host=”localhost” –db-name=”magento2″ –db-user=”root” –db-password=”root” –admin-firstname=”admin” –admin-lastname=”admin” –admin-email=”user@example.com” –admin-user=”admin” –admin-password=”Admin@123456″ –language=”en_US” –currency=”USD” –timezone=”America/Chicago” –use-rewrites=”1″ –backend-frontname=”admin” –search-engine=elasticsearch7 –elasticsearch-host=”localhost” –elasticsearch-port=9200
Magento supports PHP 7.3.0 or later. Please read https://devdocs.magento.com/guides/v2.4/install-gde/system-requirements-tech.html
And then it stops.
Can you please help
What is your php version? Magento2.4.2 supports PHP 7.4.x version.
When I check for php version in C:\xampp it shows PHP 7.1.24 , but inside C:\xampp\php it shows PHP 7.4.20
Uninstall the php version 7.1.24.
You did a Awesome Job, I spend almost 3 days after that I saw your blog. it will very helpful to complete my installation. Thank you very much.
Thank you so much Mohan !!
I tried so many time on window 8.1not working completely. after installation of window 10 it running very well thankyou Thecoachsmb.
Thank you for such detailed instructions. I install it on Windows 10 and it works fine!
Thank you Sergey Melkumyan for your feedback. !!
Thank you for the details instruction. However, even though I already installed Magento 2 successfully, I still cannot access https://yourname.magento.com since it keep loading like forever. I already tried your quick fix 2 times but to no avail. Besides, the url http://yourname.magento.com/admin/ shows Error 404 on my end as well.
Restart Apache and Mysql from Xampp Control Panel.
Then flush the Cache and check.
Thank you very much , really this is point 2 point guide to install M2.4 to xampp and tackle its problem , grt work , have you made any vedios on M2.4 page builder , please share it thanks you
Hello Sonal,
Thank you very much for each step and the Magento 2.4.2 was successfully installed on my localhost.
I subscribed your YouTube channel also.
Best Regards,
Mintu
Great !! Thank you Mintu for the feedback.
I have ready your article, I have successfully installed the Magento 2.4.2.
Thanks
Great !! Thank you for the feedback.