-
Apr, Wed, 2022

Install Magento 2.4.4 or Magento 2.4.5 or Magento 2.4.6 on Windows- Step By Step Guide
Table of Contents
COMPOSER
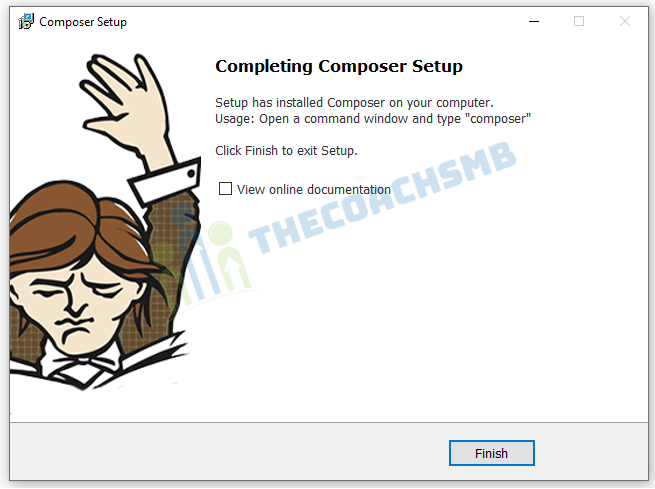
Now we will install Composer on localhost.
Composer is a library management tool in PHP (Dependency Management), this tool saves us a lot of time with the necessary packages that your project needs to use, you just need to declare it, Composer will automatically download the code of the libraries through a community server.
>Download Composer Windows version here: Click Here To Download Composer
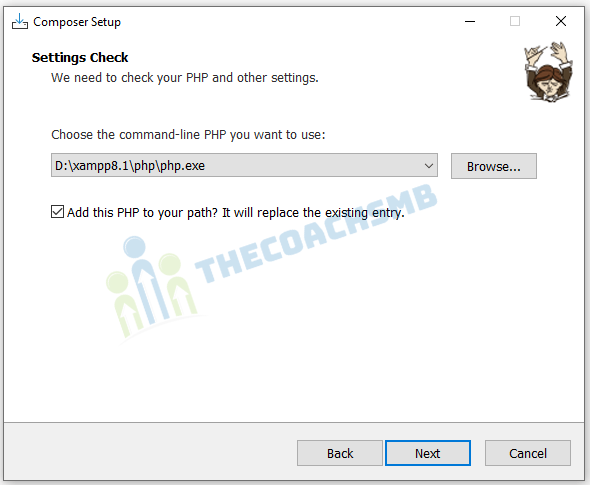
Select the php.exe file of php version 8.1
Continue the process…
Run below command:
composer self-update 2.4.2Now we will verify if Composer was successfully installed by opening Windows Command Promp and type composer . If the command prompt screen returns this outcome > Composer was installed properly
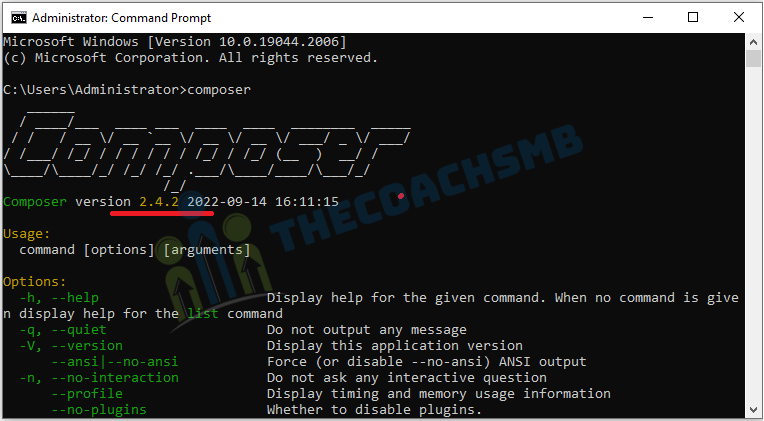
Check current composer version 2.4.2.

Step 2: Install elasticsearch on windows OS
Elasticsearch is now a required application to install Magento 2.4. During installation process, the system will verify if Eleasticsearch was installed and configured properly. If there’s something wrong with Elasticsearch verification, the installation process will stop.
Download Elasticsearch 7.17 for Magento 2.4.5 for Windows here: Click Here To Download Elasticsearch here
OR
Download Elasticsearch 7.16 for Magento 2.4.4 for Windows here: Click Here To Download Elasticsearch here
Next, unzip archived file at the “D:\xampp8.1\htdocs\” as shown below and go to \elasticsearch-7.17.0\bin
Right click on elasticsearch.bat and select run as administrator
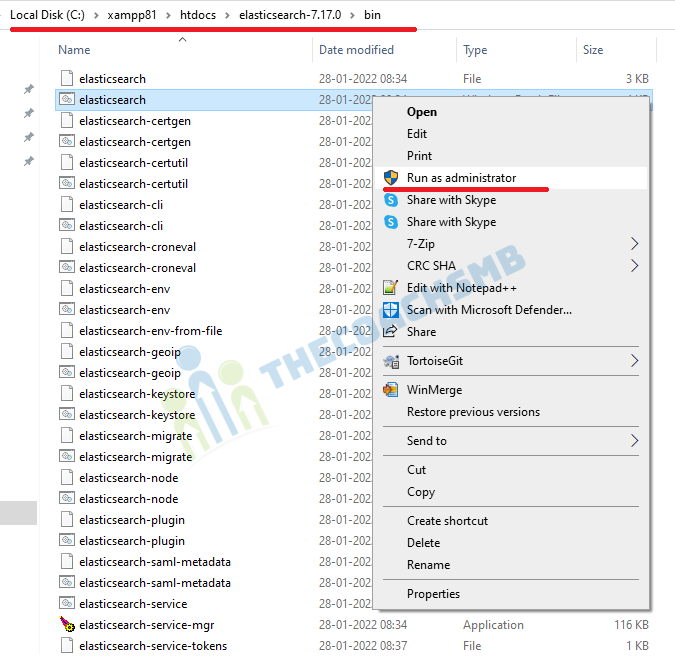
Leave this window running on background
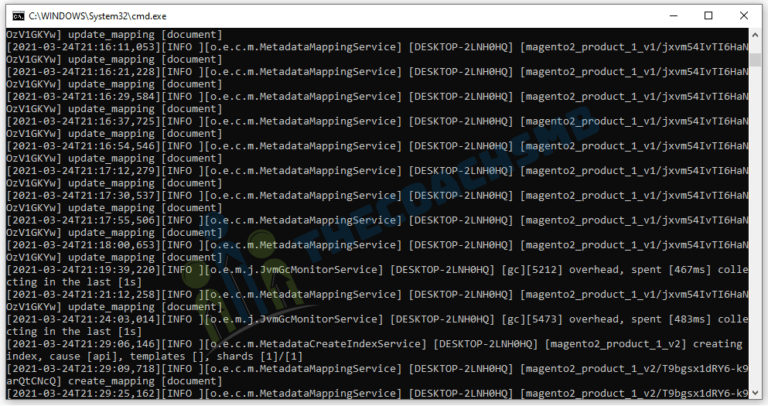
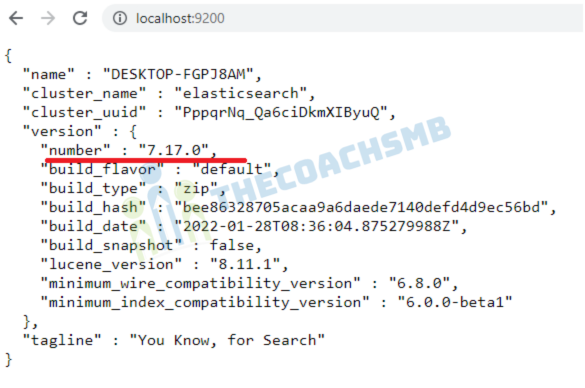
To check if Elasticsearch is running on your system, in your browser type: localhost:9200
If you see this result page => Elasticsearch is running properly
Step 3: Enable PHP extensions & Configure php.ini
Before we will install Magento 2, make sure to install and enable all required PHP extensions and configure some PHP values to make the installation go smoothly
Enable required php extensions
As stated in Magento 2.4 system requirement, we need to install and enable the following php extension
| bcmath | ctype | curl | dom |
| gd | hash | iconv | intl |
| mbstring | openssl | pdo_mysql | simplexml |
| soap | xsl | zip | ext-sockets |
On windows OS, all the extensions are automatically and periodically compiled by the PHP Group. You just need to enable these required extensions in php.ini
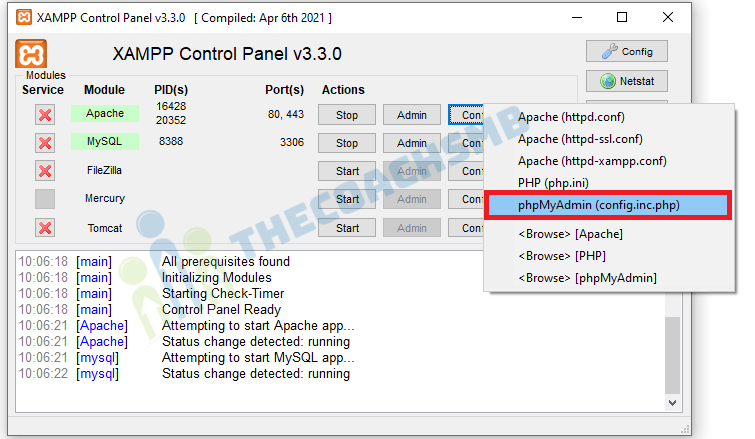
Quick tip: You can quickly open php.ini on Xampp interface with this button

The other extensions are enabled by default after we install Xampp, so we don’t need to include them here. Remember to save files before exiting.
Configure php settings
In php.ini file, search and change the following values as below
max_execution_time=18000
max_input_time=1800
memory_limit=4G
These values will keep the installation go properly without interruption.
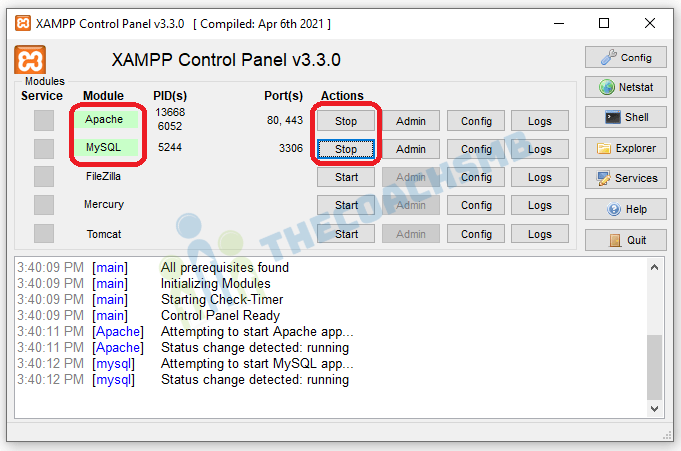
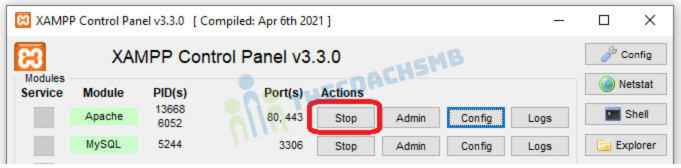
Finally, restart apache to apply php settings by click on apache Stop and Start button on XAMPP
Step 4: Create database for Magento 2
Before we process the installation, we have to create a database for Magento 2 website to store all settings related to products, catalog, users, store configuration….
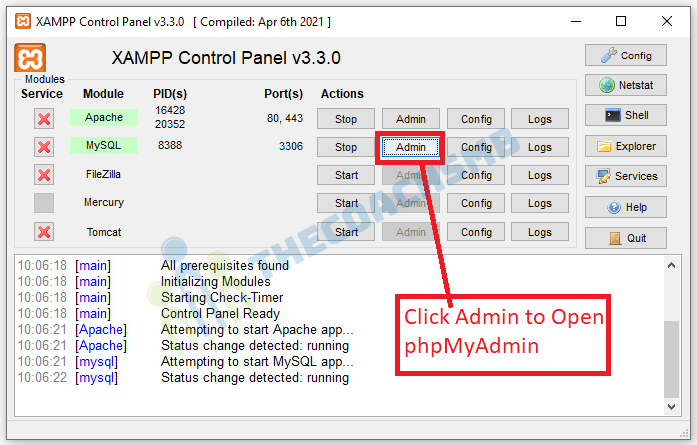
In Xampp interface, open PHPmyadmin by clicking on Admin button to open phpmyadmin
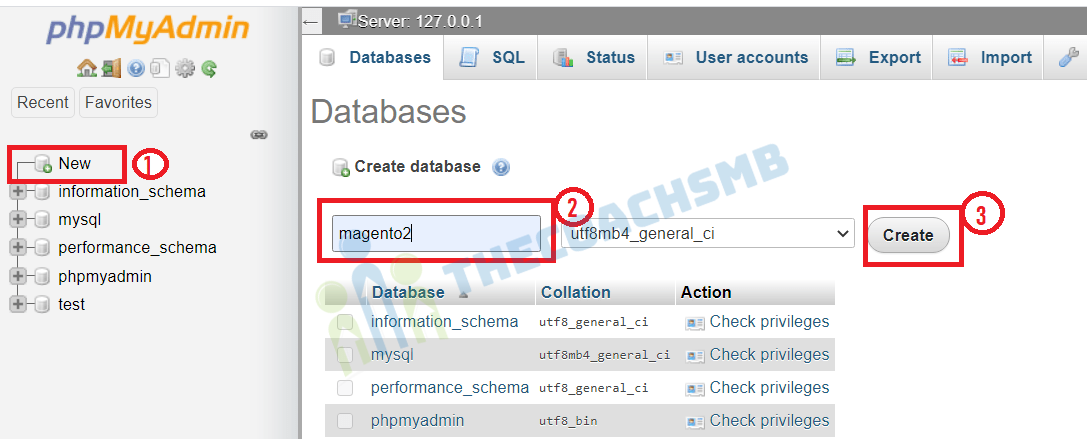
On phpmyadmin page, click on New => type database name => click on Create to create a new database. For example, I create magento2 database here
By default, Xampp does not set a password for MYSQL, so we will need to create a new root password for mysql.
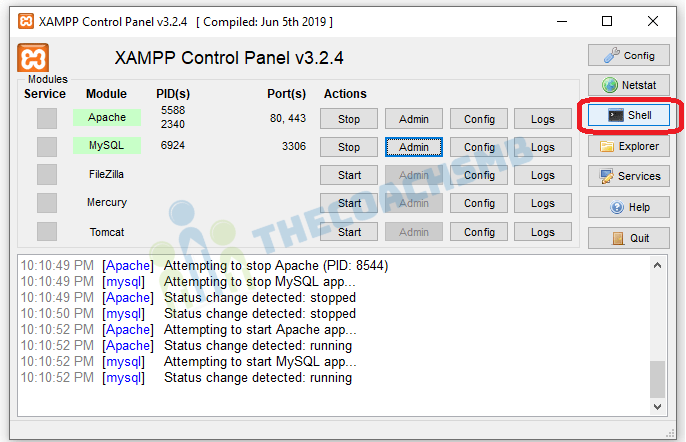
On Xampp, click on Shell button to open command interface
Next, input the following command to change mysql root password
mysqladmin.exe -u root password root
and press Enter. I put root as password.
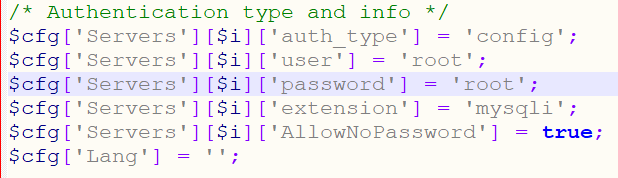
Now, to use phpmyadmin, you will also need to enter the new password. To make phpmyadmin automatically login with your new password, Open config.inc.php , to open this file, see the screenshot below
And insert your new password here
Finally, restart apache to apply php settings by click on apache Stop and Start button on XAMPP

Step 5: Install Magento 2.4.4 or Magento 2.4.5
Now every preparation steps are done and we can start installing Magento 2 on Localhost.
In command prompt, cd D:\xampp8.1\htdocs,
Run below command for Magento 2.4.4
composer create-project --repository-url=https://repo.magento.com/ magento/project-community-edition=2.4.4 magento2
Run below command for Magento 2.4.5
composer create-project --repository-url=https://repo.magento.com/ magento/project-community-edition=2.4.5 magento2
Run below command for Magento 2.4.6
composer create-project --repository-url=https://repo.magento.com/ magento/project-community-edition=2.4.6 magento2
magento2 – is the folder name
Create an account on Magento marketplace and go to https://marketplace.magento.com/customer/accessKeys/ to get private and public access key,
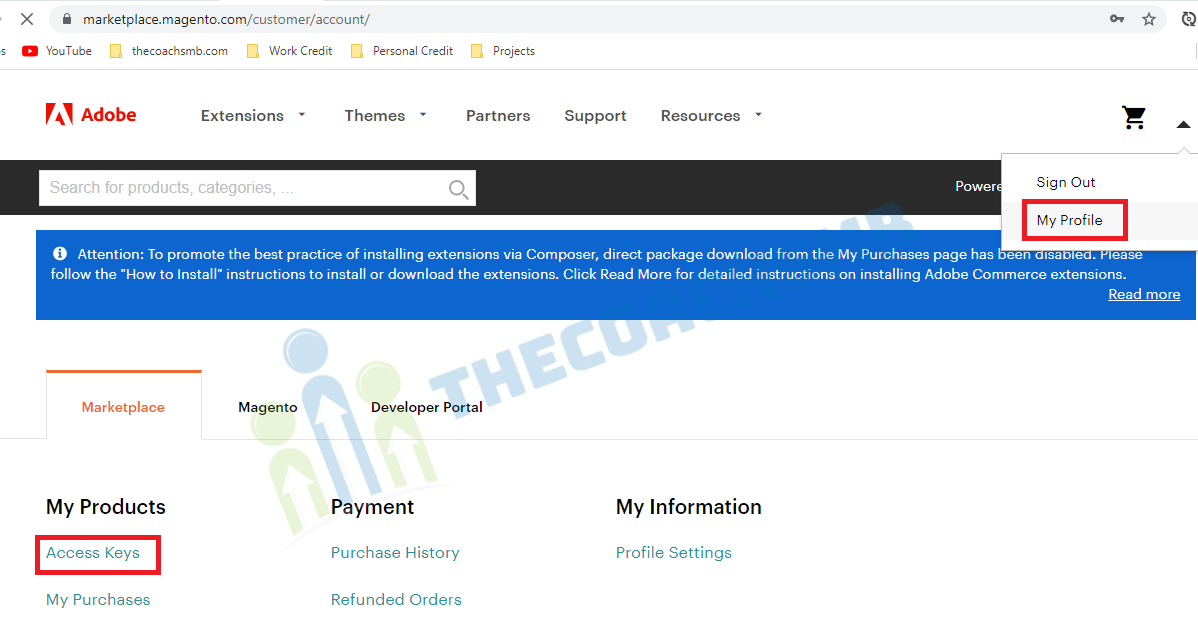
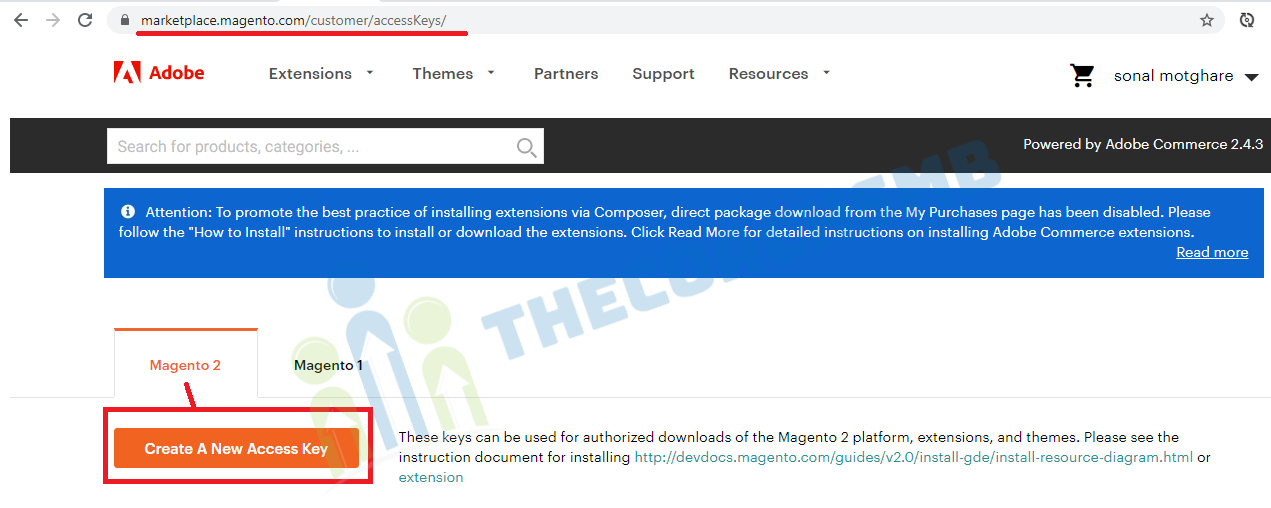
Create Access keys here. If you have access keys, you can use those. Or you can use below keys
Now enter Username and password to start downloading
- Username: Your public Key 2fc966a913d4e83b28041eeb3c3b72e5
- Password: Your private key. 48e05400d17ca1bcb4e693825c45416e
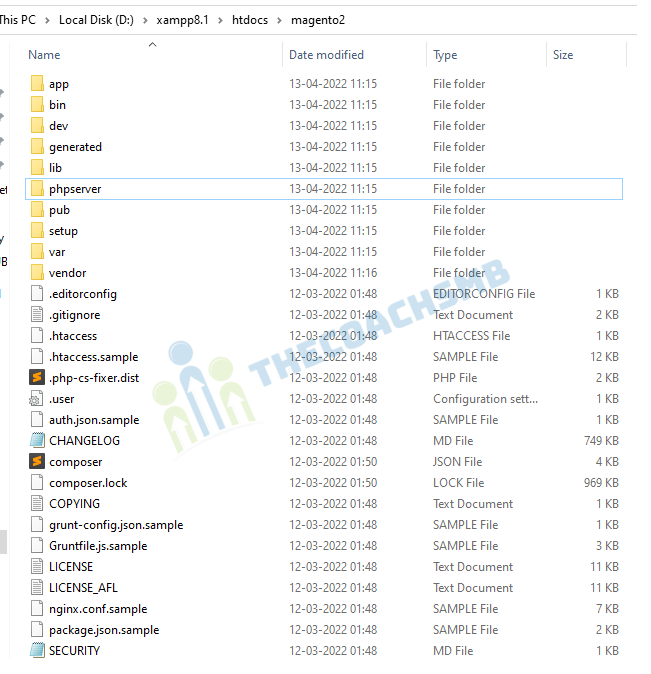
Now, see the magento2 folder with all files and folders.
Server configuration
The Magento is served from magento2/pub folder. The rest of the Magento file system is vulnerable because it is accessible from a browser. Setting the webroot to the pub/ directory prevents site visitors from accessing sensitive areas of the Magento file system from a browser.
We need to set document root to pub, to do this go to file D:\xampp8.1\apache\conf\extra\httpd-vhosts.conf
Add this content in the bottom of the file.
<VirtualHost *:80>
    DocumentRoot "D:/xampp8.1/htdocs/magento2/pub"
    ServerName yourname.magento.com
</VirtualHost>
<VirtualHost *:80>
    DocumentRoot "D:/xampp8.1/htdocs"
    ServerName localhost
</VirtualHost>
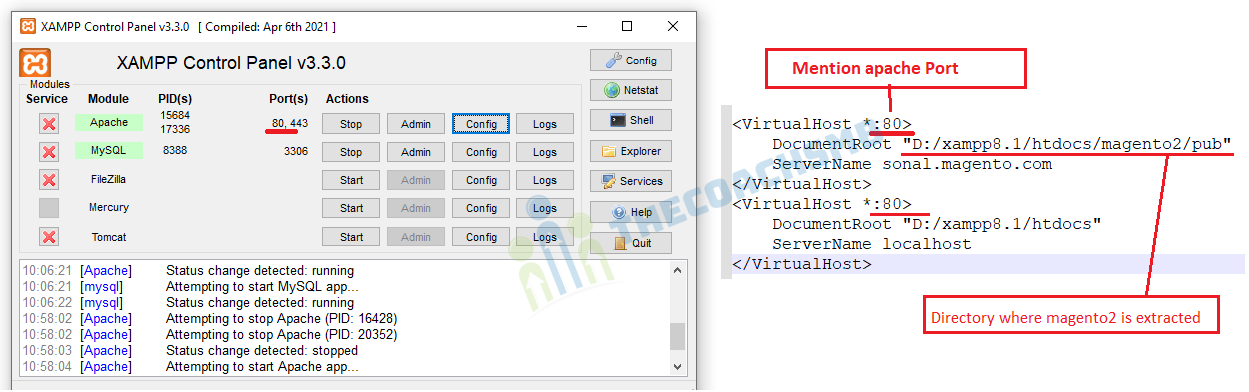
Where,
DocumentRoot "D:/xampp8.1/htdocs/magento2/pub"=> location of the magento2 folder path
yourname.magento.com – this is the base url which you can set as per your wish. Ex: – sonal.magento.com
Now, Open notepad with “Run as administrator”.
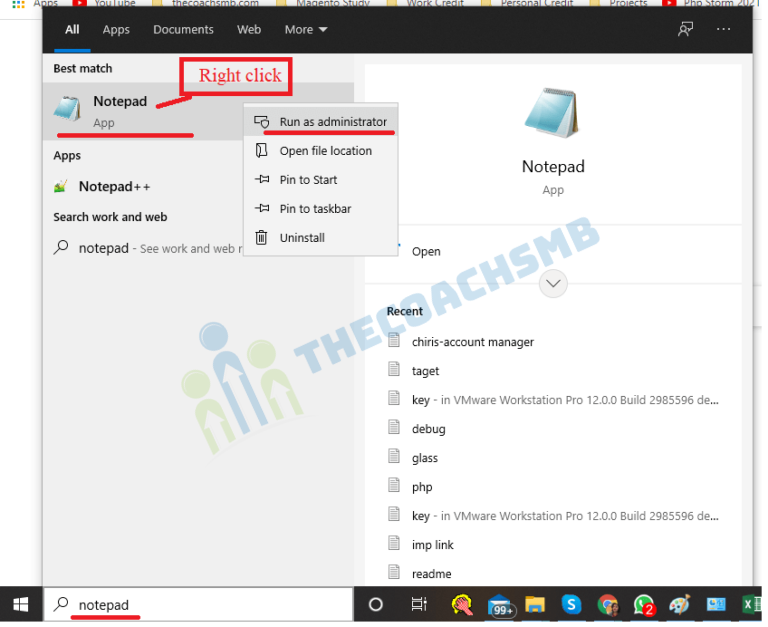
lets open C:\Windows\System32\drivers\etc\hosts file in notepad and add the below line at the bottom of the file.
127.0.0.1 yourname.magento.com
Restart apache to apply php settings by click on apache Stop and Start button on XAMPP
Now insert this command to start installing Magento 2 (make sure Elasticsearch, Apache, Mysql all are running before execute this command)
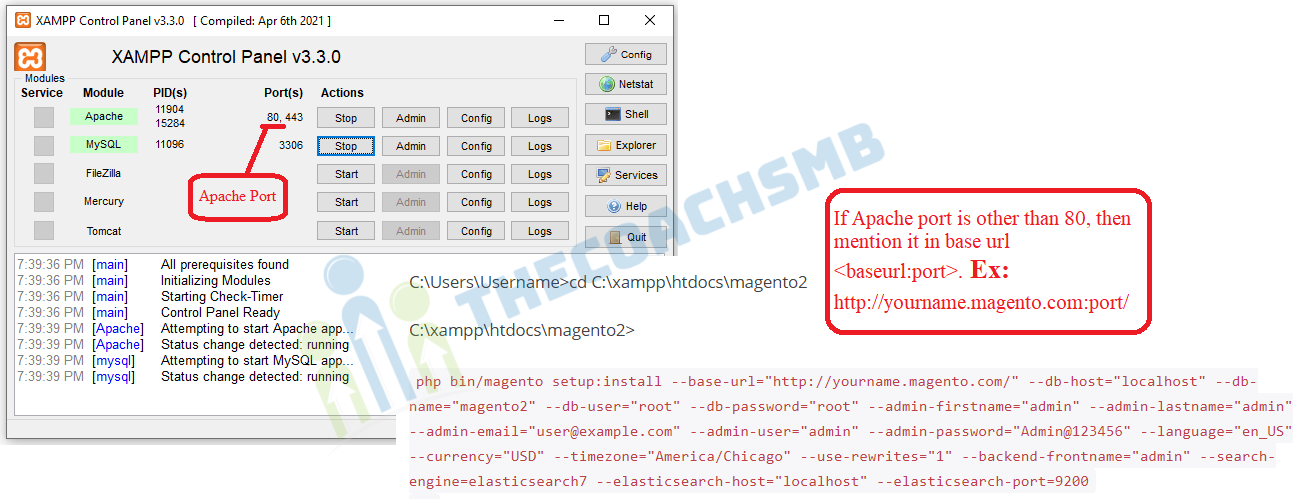
Open the command prompt, type below commands:-
C:\Users\Username>d:
D:\>cd D:\xampp8.1\htdocs\magento2
D:\xampp8.1\htdocs\magento2>
php bin/magento setup:install --base-url="http://yourname.magento.com/" --db-host="localhost" --db-name="magento2" --db-user="root" --db-password="root" --admin-firstname="admin" --admin-lastname="admin" --admin-email="user@example.com" --admin-user="admin" --admin-password="Admin@123456" --language="en_US" --currency="USD" --timezone="America/Chicago" --use-rewrites="1" --backend-frontname="admin" --search-engine=elasticsearch7 --elasticsearch-host="localhost" --elasticsearch-port=9200 Replace these values:
- –base-url: your magento 2 installation folder
- –db-name: your database name in step 3
- –db-password: your database password in step 3
Other values are optional, we can change later.

Now if everything is done properly, Composer will start to install Magento 2.
In PatchApplier.php line 170:
Unable to apply data patch Magento\Theme\Setup\Patch\Data\RegisterThemes for module Magento_Theme. Original exception message: Wrong file
In Gd2.php line 72: Wrong file
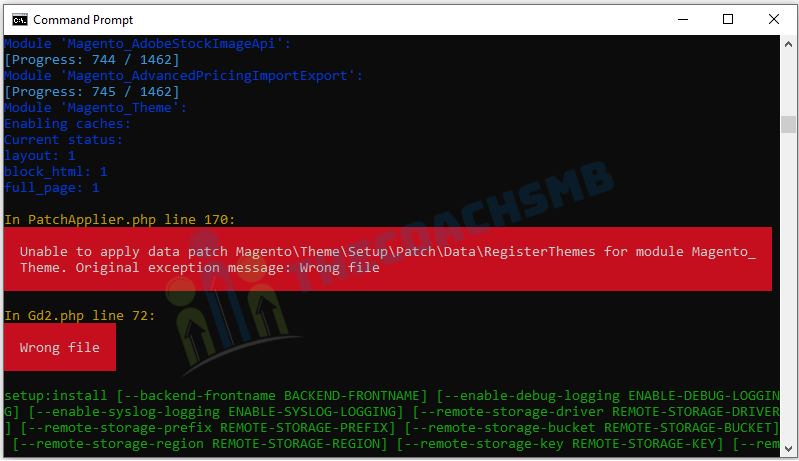
Solution: –
Here Image Adapter try opens to image files (‘open function in Gd2.php line 72). validateURLScheme function return false always because it checking ‘URL’ format but local files not valid for this format, so it returns false.
Find validateURLScheme function in vendor\magento\framework\Image\Adapter\Gd2.php file. at line 92. Replace function with this:
private function validateURLScheme(string $filename) : bool
{
          $allowed_schemes = ['ftp', 'ftps', 'http', 'https'];
          $url = parse_url($filename);
          if ($url && isset($url['scheme']) && !in_array($url['scheme'], $allowed_schemes) && !file_exists($filename)) {
              return false;
          }

          return true;
}
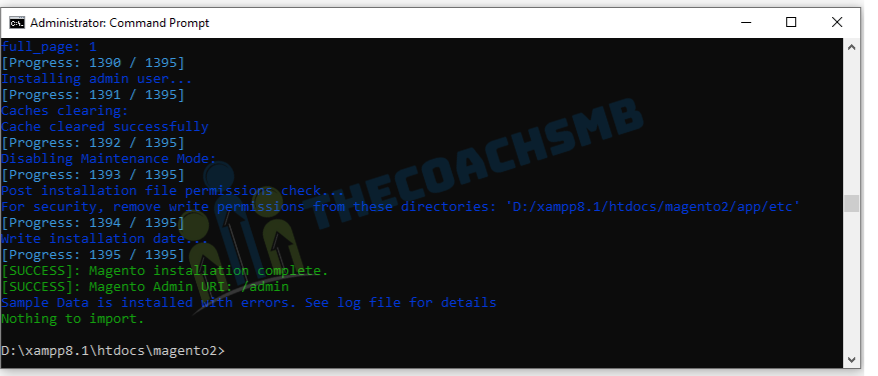
And you will get the output as shown below.
Now if you go to your browser with this URL to access Magento 2 store: http://yourname.magento.com(In my machine, I have setup to http://sonal.magento.com/) .You will probably see page like this
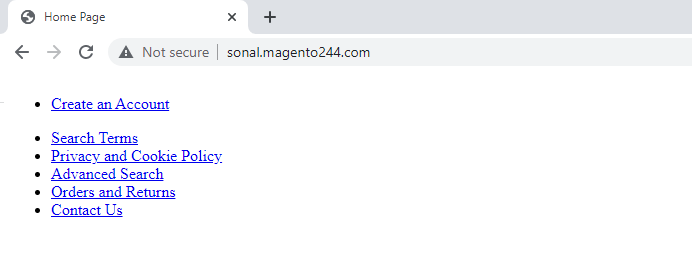
Here’s how to fix this:
Go to: D:\xampp8.1\htdocs\magento2\vendor\magento\framework\View\Element\Template\File
Edit Validator.php using a text editor and find this line:
instead of
strpos($realPath, $directory)
use
strpos($path, $directory)Save the File.
Then,
Open up app/etc/di.xml in the editor,
– Find the path “Magento\Framework\App\View\Asset\MaterializationStrategy\Symlink” and replace to “Magento\Framework\App\View\Asset\MaterializationStrategy\Copy”
Save the file.
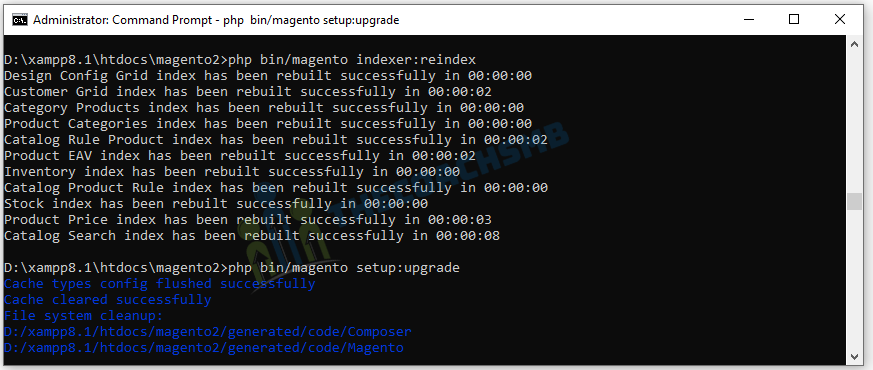
Wait for the process to complete.
php bin/magento setup:static-content:deploy -f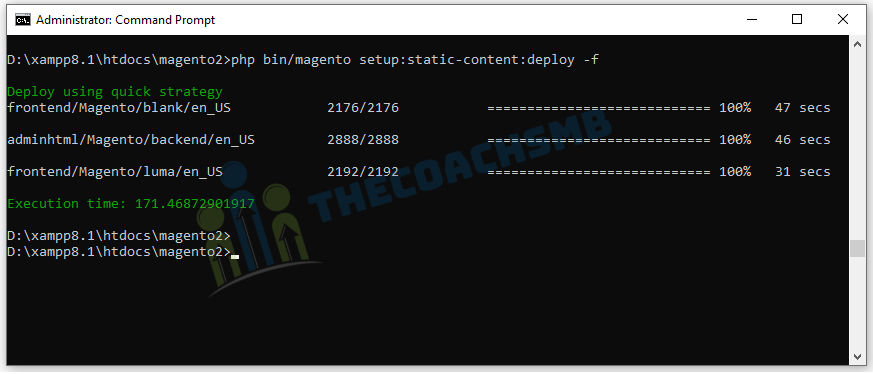
php bin/magento cache:flush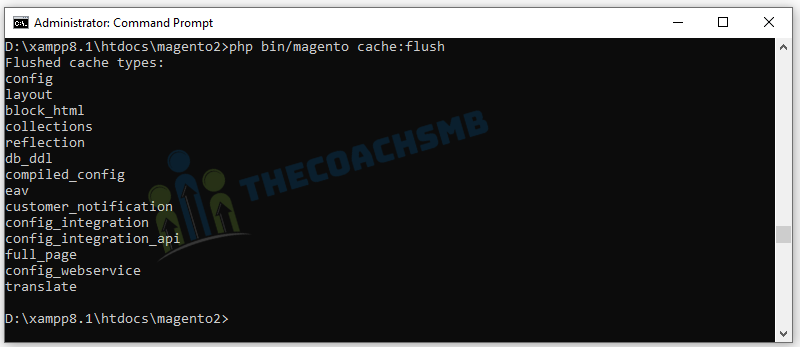
Now reload your website and you will see the your new Magento 2 website on localhost.
This is Magento 2 Home page without sample data.
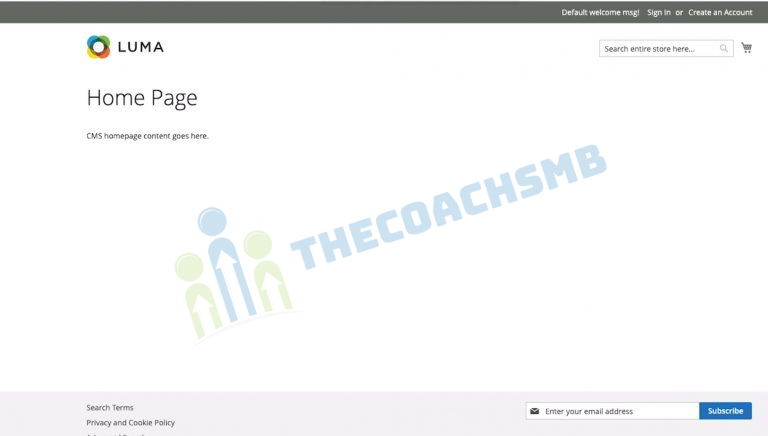

If you haven’t installed magento 2.4.4 or magento2.4.5 with sample data and now wants to do it follow below Step 5.
Product Image not displaying:
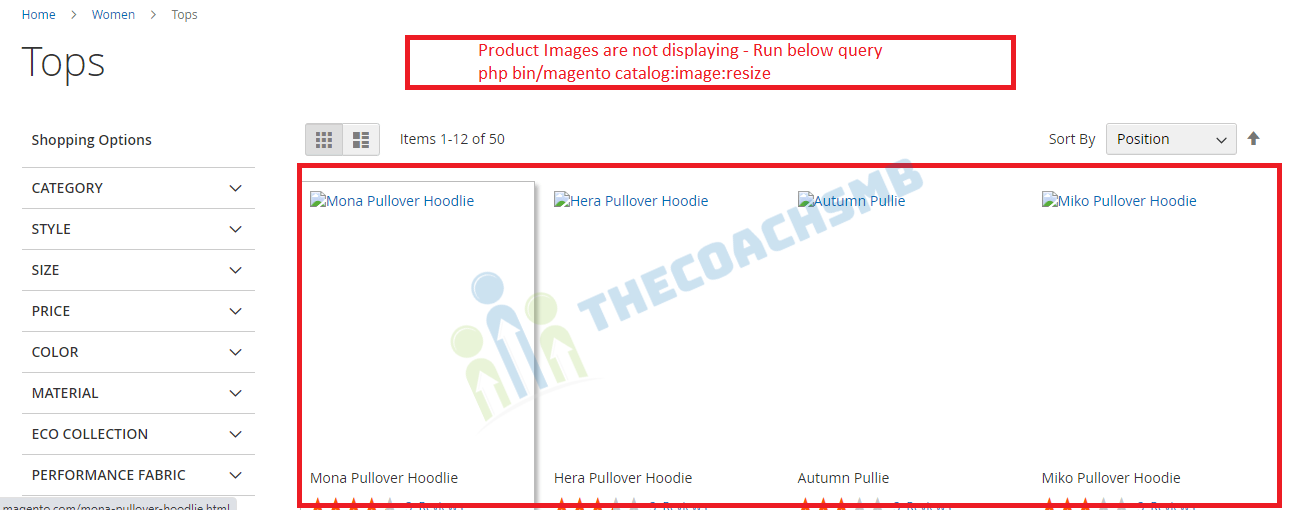
Solution:-
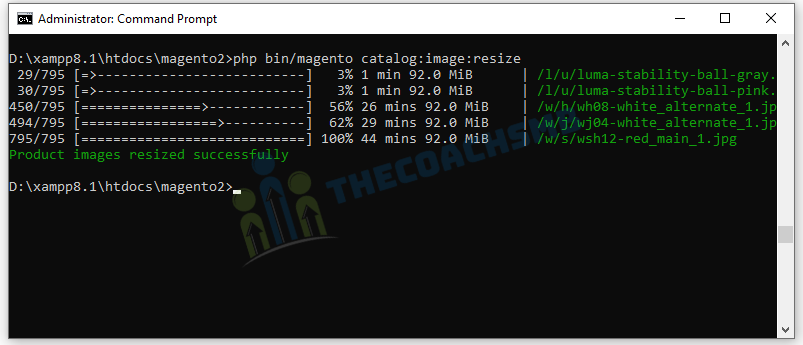
Run the query as shown in the screenshot
php bin/magento catalog:image:resize
You will see output as below:
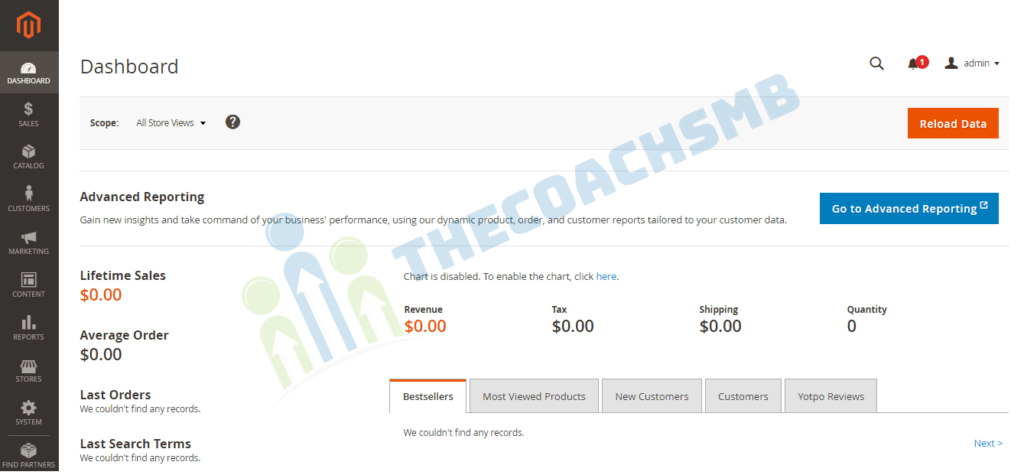
Admin login :-
Your Admin Url – http://yourname.magento.com/admin/
When logging to admin dashboard with username – admin and password – Admin@123456(which we set in magento install command), you may see this error

To fix this issue, open Magento 2 Command prompt and run this command
php bin/magento module:disable Magento_TwoFactorAuth Magento_AdminAdobeImsTwoFactorAuth
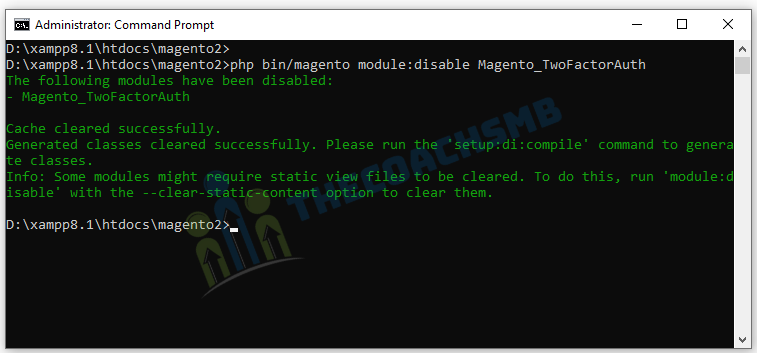
Now refresh admin page and you will be able to log in to admin dashboard normally.
Step 6: Install sample data for Magento 2.4.4
Now we will deploy sample data for our new Magento 2.4.4 website on localhost. Sample data will fill your website with some products, categories and images so your website will look like this:
To install the sample data, run the below command
php bin/magento sampledata:deploy && php bin/magento indexer:reindex && php bin/magento se:up && php bin/magento se:s:d -f && php bin/magento c:f

Watch the complete video for step by step Guide
Conclusion
In this article, we have installed magento2.4.4 on Windows successfully. Feel free to connect us of you need any help.
There are few things to note, we need to keep elasticsearch, Apache and MySQL start while working on Magento2.4.4.
We would love to hear feedback from you ALL.
when executing this command “composer create-project –repository-url=https://repo.magento.com/ magento/project-community-edition=2.4.5 magento2” following error shows up : The “https://repo.magento.com/packages.json” file could not be download
ed (HTTP/2 404 ):
{“warning”:”You haven\u0027t provided your Magento authentication keys.
For instructions, visit https:\/\/devdocs.magento.com\/guides\/v2.3\/i
nstall-gde\/prereq\/connect-auth.html”}
Follow – Step 5: Install Magento 2.4.4 or Magento 2.4.5 again
SONAL
Merciiiiiiiiiiiiiiiiiiiiiiiiiiiiiiiiiiiiiiiiii infiniment
Thank you very very match
Installation process described very well with step by step process. It worked for me. Thanks!
Hi Sonal thanks for the great post. I am able to install Magento2 in my windows system without any problem. It takes me less then 2 hours to complete the process. Keep up the good work. You saved us in this Hell installing process.
After installation when I enter the admin login there is no response just refresh the page
please guide me I’m stuck for last week
See in the system.log, what is the error
how to host magento project localserver to liveserver (like in godaddy). reply me fast
Magento needs 8GB RAM, and choose server as Ubuntu and follow this to install https://www.thecoachsmb.com/install-magento-2-4-5-on-ubuntu-22-04-complete-guide/
Hello, i have used this step to install magento2. But when i am adding any custom module. It is not showing in the admin panel. Can you suggest any way for that
Follos This : – https://thecoachsmb.com/create-module
Hello,
I appreciate for your unique course of how to install magento2 on Windows. Did you have any resemble guidance for installing on Ubuntu?
Hello Jamal
To install Magento2 on Ubuntu – Follow this –
Thanks
Hi thanks for help☻
Your requirements could not be resolved to an installable set of packages.
Problem 1
– Root composer.json requires magento/product-community-edition 2.4.5 -> satisfiable by magento/product-community-edition[2.4.5].
– magento/product-community-edition 2.4.5 requires php ~7.4.0||~8.1.0 -> your php version (8.2.0) does not satisfy that requirement.
Problem 2
– magento/composer-root-update-plugin 2.0.0 requires php ~7.3.0||~7.4.0 -> your php version (8.2.0) does not satisfy that requirement.
– magento/composer-root-update-plugin 2.0.2 requires php ~7.3.0||~7.4.0||~8.0.0||~8.1.0 -> your php version (8.2.0) does not satisfy that requirement.
– Root composer.json requires magento/composer-root-update-plugin ~2.0 -> satisfiable by magento/composer-root-update-plugin[2.0.0, 2.0.2].
How can i downgrade ph?
donwload xampp of php 8.1
HELLO MAM I AM GETTING THIS TYPE ERROR
PLEASE HELP ME OUT FROM THIS
PHP Deprecated: Return type of phpseclib_mcrypt_filter::filter($in, $out, &$consumed, $closing) should either be compatible with php_user_filter::filter($in, $out, &$consumed, bool $closing): int, or the #[\ReturnTypeWillChange] attribute should be used to temporarily suppress the notice in C:\xampp\htdocs\magento2.4\vendor\phpseclib\mcrypt_compat\lib\mcrypt.php on line 1107
Deprecated: Return type of phpseclib_mcrypt_filter::filter($in, $out, &$consumed, $closing) should either be compatible with php_user_filter::filter($in, $out, &$consumed, bool $closing): int, or the #[\ReturnTypeWillChange] attribute should be used to temporarily suppress the notice in C:\xampp\htdocs\magento2.4\vendor\phpseclib\mcrypt_compat\lib\mcrypt.php on line 1107
PHP Deprecated: Return type of phpseclib_mcrypt_filter::onCreate() should either be compatible with php_user_filter::onCreate(): bool, or the #[\ReturnTypeWillChange] attribute should be used to temporarily suppress the notice in C:\xampp\htdocs\magento2.4\vendor\phpseclib\mcrypt_compat\lib\mcrypt.php on line 1158
Deprecated: Return type of phpseclib_mcrypt_filter::onCreate() should either be compatible with php_user_filter::onCreate(): bool, or the #[\ReturnTypeWillChange] attribute should be used to temporarily suppress the notice in C:\xampp\htdocs\magento2.4\vendor\phpseclib\mcrypt_compat\lib\mcrypt.php on line 1158
PHP Deprecated: Return type of phpseclib_mcrypt_filter::onClose() should either be compatible with php_user_filter::onClose(): void, or the #[\ReturnTypeWillChange] attribute should be used to temporarily suppress the notice in C:\xampp\htdocs\magento2.4\vendor\phpseclib\mcrypt_compat\lib\mcrypt.php on line 1221
Deprecated: Return type of phpseclib_mcrypt_filter::onClose() should either be compatible with php_user_filter::onClose(): void, or the #[\ReturnTypeWillChange] attribute should be used to temporarily suppress the notice in C:\xampp\htdocs\magento2.4\vendor\phpseclib\mcrypt_compat\lib\mcrypt.php on line 1221
PHP Fatal error: During inheritance of Countable: Uncaught Exception: Deprecated Functionality: Return type of Laminas\Http\Headers::count() should either be compatible with Countable::count(): int, or the #[\ReturnTypeWillChange] attribute should be used to temporarily suppress the notice in C:\xampp\htdocs\magento2.4\vendor\laminas\laminas-http\src\Headers.php on line 385 in C:\xampp\htdocs\magento2.4\lib\internal\Magento\Framework\App\ErrorHandler.php:61
Stack trace:
#0 C:\xampp\htdocs\magento2.4\vendor\laminas\laminas-http\src\Headers.php(26): Magento\Framework\App\ErrorHandler->handler(8192, ‘Return type of …’, ‘C:\\xampp\\htdocs…’, 385)
#1 C:\xampp\htdocs\magento2.4\vendor\composer\ClassLoader.php(582): include(‘C:\\xampp\\htdocs…’)
#2 C:\xampp\htdocs\magento2.4\vendor\composer\ClassLoader.php(433): Composer\Autoload\{closure}(‘C:\\xampp\\htdocs…’)
#3 C:\xampp\htdocs\magento2.4\vendor\laminas\laminas-zendframework-bridge\src\Autoloader.php(107): Composer\Autoload\ClassLoader->loadClass(‘Laminas\\Http\\He…’)
#4 C:\xampp\htdocs\magento2.4\vendor\laminas\laminas-http\src\Request.php(370): Laminas\ZendFrameworkBridge\Autoloader::Laminas\ZendFrameworkBridge\{closure}(‘Laminas\\Http\\He…’)
#5 C:\xampp\htdocs\magento2.4\vendor\laminas\laminas-http\src\PhpEnvironment\Request.php(237): Laminas\Http\Request->getHeaders()
#6 C:\xampp\htdocs\magento2.4\vendor\laminas\laminas-http\src\PhpEnvironment\Request.php(85): Laminas\Http\PhpEnvironment\Request->setServer(Object(Laminas\Stdlib\Parameters))
#7 C:\xampp\htdocs\magento2.4\vendor\laminas\laminas-mvc\src\Service\RequestFactory.php(27): Laminas\Http\PhpEnvironment\Request->__construct()
#8 C:\xampp\htdocs\magento2.4\vendor\laminas\laminas-servicemanager\src\ServiceManager.php(620): Laminas\Mvc\Service\RequestFactory->__invoke(Object(Laminas\ServiceManager\ServiceManager), ‘Request’, NULL)
#9 C:\xampp\htdocs\magento2.4\vendor\laminas\laminas-servicemanager\src\ServiceManager.php(242): Laminas\ServiceManager\ServiceManager->doCreate(‘Request’)
#10 C:\xampp\htdocs\magento2.4\setup\src\Magento\Setup\Application.php(48): Laminas\ServiceManager\ServiceManager->get(‘Request’)
#11 C:\xampp\htdocs\magento2.4\lib\internal\Magento\Framework\Console\Cli.php(80): Magento\Setup\Application->bootstrap(Array)
#12 C:\xampp\htdocs\magento2.4\bin\magento(22): Magento\Framework\Console\Cli->__construct(‘Magento CLI’)
#13 {main} in C:\xampp\htdocs\magento2.4\vendor\laminas\laminas-http\src\Headers.php on line 26
Fatal error: During inheritance of Countable: Uncaught Exception: Deprecated Functionality: Return type of Laminas\Http\Headers::count() should either be compatible with Countable::count(): int, or the #[\ReturnTypeWillChange] attribute should be used to temporarily suppress the notice in C:\xampp\htdocs\magento2.4\vendor\laminas\laminas-http\src\Headers.php on line 385 in C:\xampp\htdocs\magento2.4\lib\internal\Magento\Framework\App\ErrorHandler.php:61
Stack trace:
#0 C:\xampp\htdocs\magento2.4\vendor\laminas\laminas-http\src\Headers.php(26): Magento\Framework\App\ErrorHandler->handler(8192, ‘Return type of …’, ‘C:\\xampp\\htdocs…’, 385)
#1 C:\xampp\htdocs\magento2.4\vendor\composer\ClassLoader.php(582): include(‘C:\\xampp\\htdocs…’)
#2 C:\xampp\htdocs\magento2.4\vendor\composer\ClassLoader.php(433): Composer\Autoload\{closure}(‘C:\\xampp\\htdocs…’)
#3 C:\xampp\htdocs\magento2.4\vendor\laminas\laminas-zendframework-bridge\src\Autoloader.php(107): Composer\Autoload\ClassLoader->loadClass(‘Laminas\\Http\\He…’)
#4 C:\xampp\htdocs\magento2.4\vendor\laminas\laminas-http\src\Request.php(370): Laminas\ZendFrameworkBridge\Autoloader::Laminas\ZendFrameworkBridge\{closure}(‘Laminas\\Http\\He…’)
#5 C:\xampp\htdocs\magento2.4\vendor\laminas\laminas-http\src\PhpEnvironment\Request.php(237): Laminas\Http\Request->getHeaders()
#6 C:\xampp\htdocs\magento2.4\vendor\laminas\laminas-http\src\PhpEnvironment\Request.php(85): Laminas\Http\PhpEnvironment\Request->setServer(Object(Laminas\Stdlib\Parameters))
#7 C:\xampp\htdocs\magento2.4\vendor\laminas\laminas-mvc\src\Service\RequestFactory.php(27): Laminas\Http\PhpEnvironment\Request->__construct()
#8 C:\xampp\htdocs\magento2.4\vendor\laminas\laminas-servicemanager\src\ServiceManager.php(620): Laminas\Mvc\Service\RequestFactory->__invoke(Object(Laminas\ServiceManager\ServiceManager), ‘Request’, NULL)
#9 C:\xampp\htdocs\magento2.4\vendor\laminas\laminas-servicemanager\src\ServiceManager.php(242): Laminas\ServiceManager\ServiceManager->doCreate(‘Request’)
#10 C:\xampp\htdocs\magento2.4\setup\src\Magento\Setup\Application.php(48): Laminas\ServiceManager\ServiceManager->get(‘Request’)
#11 C:\xampp\htdocs\magento2.4\lib\internal\Magento\Framework\Console\Cli.php(80): Magento\Setup\Application->bootstrap(Array)
#12 C:\xampp\htdocs\magento2.4\bin\magento(22): Magento\Framework\Console\Cli->__construct(‘Magento CLI’)
#13 {main} in C:\xampp\htdocs\magento2.4\vendor\laminas\laminas-http\src\Headers.php on line 26
PLEASE HELP ME OUT FROM THIS ERROR MAM
Hello JAYDEEP,
Please check if you have enabled all necessary php extensions;
extension=gd
extension=intl
extension=soap
extension=xsl
extension=sockets
extension=sodium
Thanks,
Sonal
C:\xampp\htdocs>composer create-project –repository-url=https://repo.magento.com/ magento/project-community-edition=2.4.4 magento2
Creating a “magento/project-community-edition=2.4.4” project at “./magento2”
In CreateProjectCommand.php line 371:
Project directory “C:\xampp\htdocs\magento2” is not empty.
create-project [-s|–stability STABILITY] [–prefer-source] [–prefer-dist] [–prefer-install PREFER-INSTALL] [–repository REPOSITORY] [–repository-url REPOSITORY-URL] [–add-repository] [–dev] [–no-dev] [–no-custom-installers] [–no-scripts] [–no-progress] [–no-secure-http] [–keep-vcs] [–remove-vcs] [–no-install] [–no-audit] [–audit-format AUDIT-FORMAT] [–ignore-platform-req IGNORE-PLATFORM-REQ] [–ignore-platform-reqs] [–ask] [–] [ [ []]]
how to rectify
Hello Satham,
Delete the folder “magento2” from C:\xampp\htdocs. and then run this command.
Thanks,
Thank you very much mam. This documentation was so clear step by step and resolved all my issues. Love the way it is documented. Thanks again!!
Thanks Adithyudu.
Hi Sonal, Upon install of Magento 2.4.5, I get this error:
In PatchApplier.php line 172:
Unable to apply data patch Magento\CatalogUrlRewrite\Setup\Patch\Data\UpdateUrlKeySearchable for module Magento_CatalogUrlRewrite. Original exception message: Attribute with ID: “url_key” does not exist
In EavSetup.php line 1022:
Attribute with ID: “url_key” does not exist
Could you help me with this?
Thanks
Hello Sabine,
please run the magento install command again.
Thanks
Hi Sonal,
I ran the uninstall command and then ran the install command again and it works.
Thank you so much for this tutorial and your help 🙂
Thank you for your tutorial – it is the best on the net.
After many hours and lots of difficulties, I finally managed to install Magento 2.4.5 on my localhost.
However, the store and admin URL is not displaying/opening properly.
The approval and installation start button not appear!!! on the setup page.
This is the only message which appears;
“Version 2.4.5
Welcome to Magento Admin, your online store headquarters.
Please review Terms & Agreement and read Getting Started to learn how to install Magento using the command line.”
But the orange approval and installation start button not appear.
Xampp v3.3.0
Composer 2.5.1 (running)
Elasticsearch 7.17.0 (running)
PHP 8.1
Apache 2.4.51
This button does not appear after magento2.x extensions
Firstly, thank you very much for such a detailed explanation and your kindness.Can you please help with this step, the setup all went good and for some reason after adding sample the website is not showing any images (Windows 10 , local setup), admin page has this notification
One or more indexers are invalid. Make sure your Magento cron job is running.
and checking the indexes i do see Catalog Search : Status REINDEX REQUIRED , i used the following command and the result
C:\M\xampp8.1\htdocs\magento2>php bin/magento indexer:reindex catalogsearch_fulltext
Catalog Search index process error during indexation process:
Unknown 503 error from Elasticsearch null
Even while updating with sample database i do see this
Generating autoload files
123 packages you are using are looking for funding.
Use the `composer fund` command to find out more!
Design Config Grid index has been rebuilt successfully in 00:00:00
Customer Grid index has been rebuilt successfully in 00:00:04
Category Products index has been rebuilt successfully in 00:00:00
Product Categories index has been rebuilt successfully in 00:00:00
Catalog Rule Product index has been rebuilt successfully in 00:00:03
Product EAV index has been rebuilt successfully in 00:00:00
Stock index has been rebuilt successfully in 00:00:00
Inventory index has been rebuilt successfully in 00:00:00
Catalog Product Rule index has been rebuilt successfully in 00:00:00
Product Price index has been rebuilt successfully in 00:00:01
Catalog Search index process error during indexation process:
Unknown 503 error from Elasticsearch null
Please help me how to solve this issue.
Thanks.
Hello kumar,
Please run the below command:
php bin/magento indexer:reset
and then run
php bin/magento indexer:reset
Thanks,
Sonal
Thank you very much Sonal ji.
I solved my issue with your advice and what i observed from the logs and going through Elasticsearch documents. From the AppData\local\temp\elasticsearch and geoipdirectories i do see two folders and see the same relevant data from the Elasticsearch logs.. i stopped alll Magento Apache services, deleted Elasticsearch directory and also all data from AppData\local\temp\elasticsearch. Extracted the Elasticsearch zip file to the same Magento installation directory as before.. started Elastic Search bat file (this time the log is different and created a new folders in AppData and started.. started Magento services and all went good.
Hi Sonal
This is the best and complete tutorial for installing Magento
thank you very much indeed
thank you for your time
Thanks Fatemeh.
Hello Sonal
Magento 245 installations always give error:
In SearchConfig.php line 81:
Could not validate a connection to Elasticsearch. No alive nodes found in your cluster
Best regards,
Hello Jaan,
Please keep elasticsearch running and also apache and mysql.
Thanks
http://localhost/magento2/
requested url not found
Hello Sumi,
Please check etc/hosts file and also the virtual host file. Please feel free if it still does not work.
Thanks,
Hi Sonal,
when I go to browser with the project link – http://magentofirst.magento.com/ its showing below error message.
Internal Server Error
The server encountered an internal error or misconfiguration and was unable to complete your request.
Please contact the server administrator at postmaster@localhost to inform them of the time this error occurred, and the actions you performed just before this error.
More information about this error may be available in the server error log.
Hello Supriya,
Please check your virtual host file, is proper document root specified and also you need to update the url in the etc/hosts file.
Thanks,
Sonal
Thank you for this useful tutorial.
I need to share some steps that I’ve done to complete the installation.
First, I’ve disabled Elastic Search modules to complete the Magento 2.4.5 installation
bin/magento module:disable {Magento_Elasticsearch,Magento_InventoryElasticsearch,Magento_Elasticsearch6,Magento_Elasticsearch7}
But, after following the Server configuration step exactly:
https://magento245.test/
my virtual host still gives me “ERR_SSL_SERVER_CERT_BAD_FORMAT”
when running on HTTPS, when I run on HTTP only it redirects to the directory in htdocs and gives me “Not Found URL”.
http://magento245.test/
http://localhost/magento245/
when running the pub directory it gives me the home page without any styles.
http://localhost/magento245/pub
Is there any help with that?
Hello Mohammed ,
You don’t need to disable the elasticsearch. Elasticsearch is not downloaded. Please download it again and then install it.
Thanks
Magento 2.4 installations always give that error:
“Error Could not validate a connection to Elasticsearch. No alive nodes found in your cluster”
then, stopped the installation, no way to complete the installation until I disable the Elasticsearch modules.
ok, please connect me via whatsApp or skype
Hi Ma’am , thanks for the great tutorial. First I tried installation with your tutorial local – works fine, then I tried on my cloudserver (Windows Server 2019, Plesk Obsidian)….get it installes but I still have the screen look like in STEP “Now if you go to your browser with this URL to access Magento 2 store: http://yourname.magento.com(In my machine, I have setup to http://sonal.magento.com/) .You will probably see page like this”
What could it be maybe.
Thanks for your work.
Kind regards
Hello Patrick,
Is this solved?
Thanks
Thanks a lot for this tutorial.
Helped me a lot.
Best regards from México
Thanks Rodrigo Zavala. Happy to hear that !!
Hi Sonal, really very good step by step tutorial. I could install it in one go…Thank you so much. The you tube video was also very good…
Great article and explanation. But I have some issues
after editing file
vendor\magento\framework\Image\Adapter\Gd2.php
as given in the instruction, I run the magento2 install command, and I am getting errors as shown in the link
https://ibb.co/PmzhQt8
this is composer related issue. Check php version and which magento version you are installing?
Hi,
Hope you are well.
I have done almost all. But when I run magento installation command then I get this which is in the screenshot. Please check it and help me.
https://ibb.co/pbwty4k
intl extension is missing. Enable it from php.ini file
I have installed Magento twice on my computer and it’s all good until I restart my computer. It goes to the “XAMPP dashboard” whenever I go to my magento page. What could be the problem?
You need to check the path of project directory specified in the virtual host file
Hi
Thank you!
After trying to install another magento installation on the same xampp folder, I came across an error that says
“mysqladmin.exe: connect to server at ‘localhost’ failed
error: ‘Can’t connect to MySQL server on ‘localhost’ (10061)’
Check that mysqld is running and that the socket: ‘C:/xampp/mysql/mysql.sock’ exists!”
I checked and mysql.sock does not exist
To create another Magento2 instance, you need to create new database and new dorectory at the htdocs directory
I installed everything perfectly and started margento it was fine until I rebooted my laptop. When I access the locahost – magento/admin it shows me and error message – not found. And when I go to the localhost it shows me the xampp dashboard. I can still access/see the database for magento in myphpadmin. How do I get magento up and running?
Please check this server configuration step : https://www.thecoachsmb.com/100-working-step-by-step-guide-to-install-magento-2-4-4-on-windows/#Server_configuration
PHP Fatal error: Namespace declaration statement has to be the very first statement or after any declare call in the script in D:\xampp\htdocs\magento2\vendor\magento\framework\Image\Adapter\Gd2.php on line 4
I am getting the above error
Can you please send me first 5 lines of code of D:\xampp\htdocs\magento2\vendor\magento\framework\Image\Adapter\Gd2.php file
I followed this tutorial and installed ver 2.4.3 without sample data. But when I tried to install the version with sample data I am getting the error ” Unable to apply data patch Magento\GroupedProductSampleData\Setup\Patch\Data\InstallGroupedProductSampleData for module Magento_GroupedProductSampleData. Original exce
ption message: Rolled back transaction has not been completed correctly.” Itried versions 2.4.3, 2.4.3-p2, 2.4.4 all are showing the same error. Please help
Looks like your magento2 directory not extracted properly. Please follow the unzip folder and then the install.
Nice video, but i have a problem
“Invalid Form Key. Please refresh the page.” in module Customer Login or create account
Run the indexing command and clear cache
Amazing Tutorials Coach , Yours are the only posts I look for.
Thank you for being there for us.
Thanks orion.
Hi Sonal,
I followed all the steps and got a successful magento installation but I got the below result when I try to open the sample website on my browser.
—————–
Hmmm… can’t reach this pageCheck if there is a typo in dens.magento.com.
Search the web for dens magento
If spelling is correct, try running Windows Network Diagnostics.
DNS_PROBE_FINISHED_NXDOMAIN
Could you please help me resolve the issue?
Thank you
Please follow this article to fix that error.
hello
I have a port error when I start xampp after modifying the httpd-vhosts.conf file, the port used is 80.
Thank you and I hope your answer.
When you open the xampp control panel, what is the port for Apache? you need to mention the same in httpd-vhosts.conf file
Thanks for the solution. It is working fine.
but in my system host file gets reset to blank file.
Can you help me with the issue?
Hello Vibhu,
Open the system hosts file with the administrator privileges.
Thanks,
Sonal
very nice tutorial.
excuse me mam, can you help me how to add home link on navigation bar?
Hello Brad Wisesa,
Add below code in \app\design\frontend\Vendor\theme\Magento_Theme\templates\html\topmenu.phtml
above this line –
then cache flush. It should display Home link on the navigation.
Thanks,
Sonal
very nice tutorial.
excuse me mam, can you help me how to add custom link to home on navigation bar on top?
Hello Brad Wisesa,
Add below code in \app\design\frontend\Vendor\theme\Magento_Theme\templates\html\topmenu.phtml
above this line –
then cache flush. It should display Home link on the navigation.
Thanks,
Sonal
Hi Sonal,
Magento 2.4.4 installation is done, it is very high level explanation, I like your patience, Good Luck
Everyone please follow the as it is steps , don’t think heavy, it is very easy after i referred this link. Once again thanks lot of Sonal
Thanks Achyuta for the feedback.
on the step “php bin/magento setup:install…” my pc says run “composer install” I did it and the command started
the theme patch is for the file in \lib\internal\Magento\Framework\Image\Adapter\Gd2.php not vendor\magento\framework\Image\Adapter\Gd2.php
anyway it freezees on “Magento_Catalog”
Hello Perry,
It looks like you missed some steps. I request you to follow this article step by step. I am sure it will install successfully. If still you get error, feel free to post here.
Thanks,
Sonal
You are amazing! I tried several different methods and kept running into errors. I was ready to give up until I found your tutorial. You explained everything so thoroughly that it finally ended up working. Thank you so much, you are the best !!!!!!!!!!!
Thanks Marc for your feedback. I an glad that this article helped you !!
Thank you Ma’am for this very helpful tutorial. More power to you and God bless
that is the only solution i got which works perfectly ,thank u
Thanks patel for your feedback.
how to host magento project localserver to live server (like in godaddy) reply me fast please. In server how to hit command of magento installation
Hello Jinal,
Magento needs 8GB RAM, and choose server as Ubuntu and follow this to install https://www.thecoachsmb.com/install-magento-2-4-5-on-ubuntu-22-04-complete-guide/
Thanks,
Sonal