
-
Jun, Mon, 2021

Magento2 – Install a third-party theme
Magento 2 allows for installation of one or multiple themes for different stores or websites in a project. The themes consist of numerous static files like images, fonts, CSS, JavaScripts, PHP and much more to update your store design.
Here we are going to tell you how to install a third-party theme in Magento 2. There are three magento 2 setup variants:
A theme can be added to your Magento 2 store
-
- Manually through uploading files;
- Using Composer
Composer-based themes are loaded from external sources and cannot be modified directly, whereas local themes are part of the project source code and therefore can be edited directly.
Let’ understand both these ways.
1. How to install Magento 2 theme manually?
This is the most popular variant of theme installation. In this step, we will select the theme which is compatible with the installed Magento2 version and business need.
If you are learning then there are free theme available on the google. You can choose from it.
Assuming you have theme and If a theme is just a set of files, for example an archive, you will need to add the theme manually. Manually installed themes are stored in the app/design/ directory.
For learning you can go for the following free theme in Magneto2
There are very easy 4 steps to achieve this: –
-
- Step 1: Unzip the theme
- Step 2: Upload the theme files
- Step 3: Use the Commands to configure theme
- Step 4: Apply the theme
Let’s get started….
Step 1: Unzip the theme
Unzip the archive of the theme.
Step 2: Upload the theme files
Navigate to the <magento2_install_dir>/of your Magento 2 store (use FileZilla or any other file manager).
-
- Upload the directory here
Step 3: Use the commands to configure theme
Travel to the directory <magento2_install_dir> through the terminal/command prompt.
Then, upgrade the setup by running this command:
php bin/magento se:up && php bin/magento se:s:d -f && php bin/magento c:f
Step 4: Apply the theme
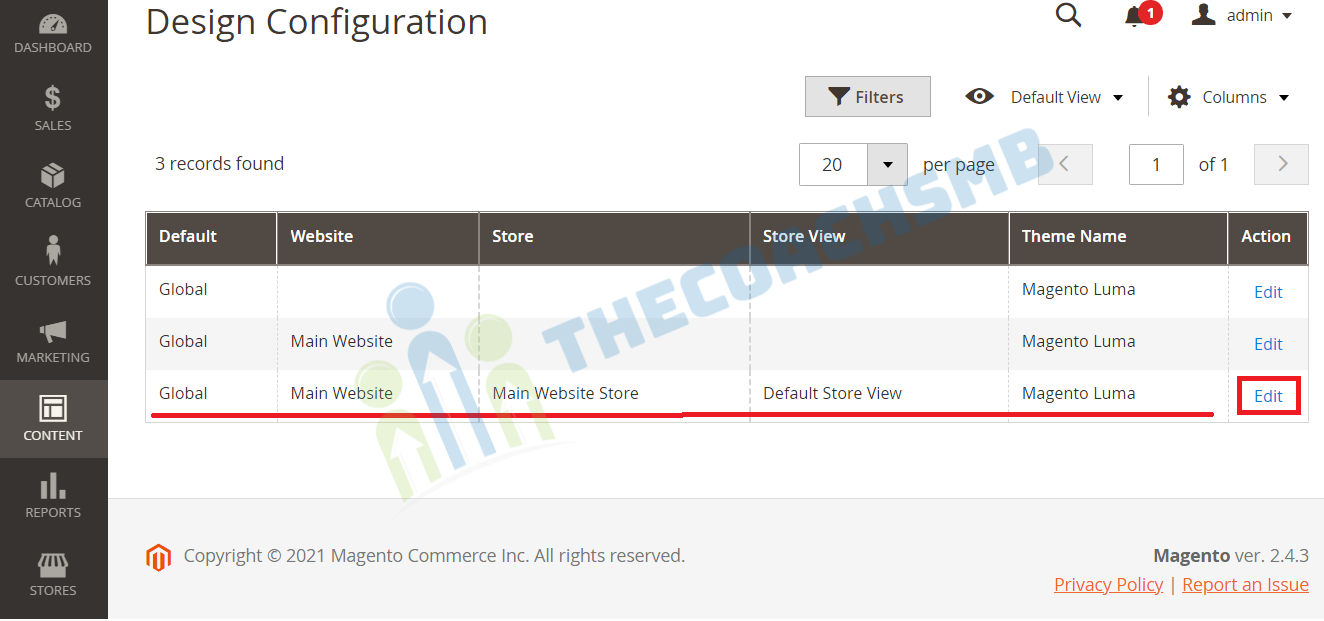
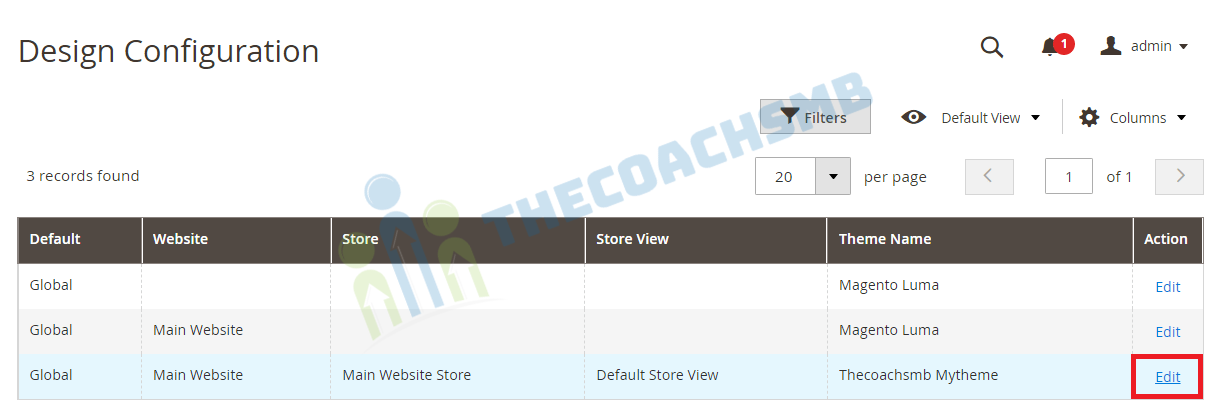
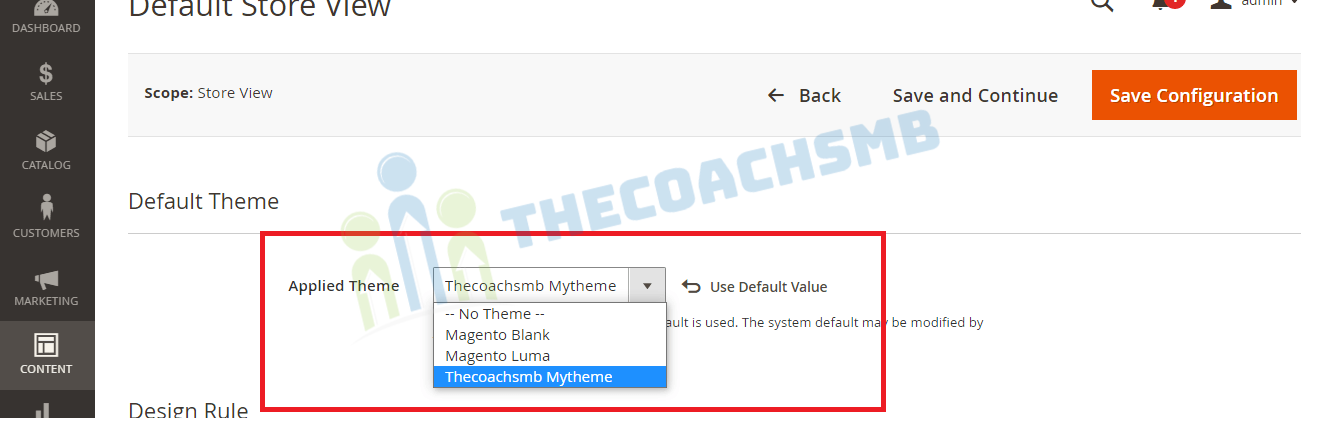
Open the admin panel of your store and Go to the Content>Design>Configuration
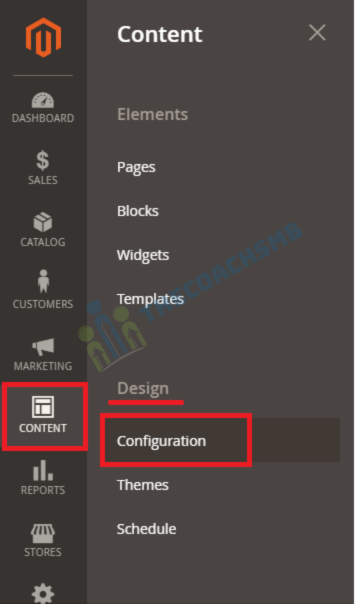
and choose Edit the store theme:
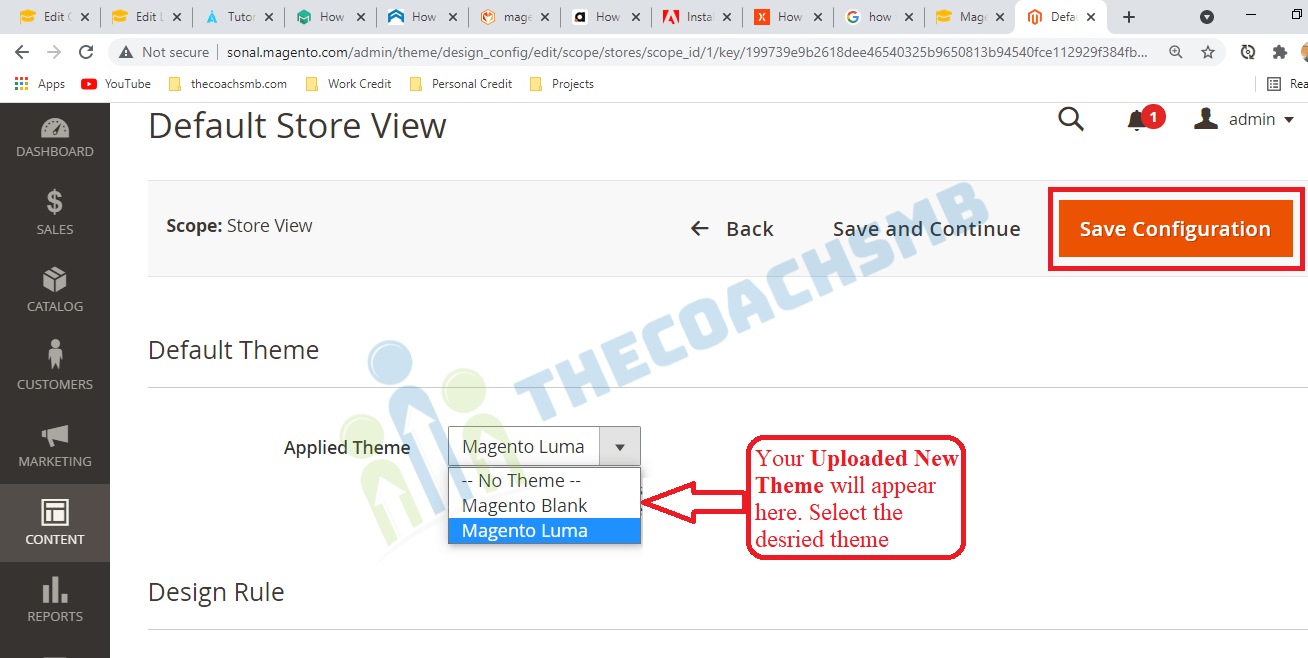
Select the desired theme from the dropdown menu and click the Save Configuration button.
Then,
php bin/magento cache:flush
In this way, we are able to install and apply the manually added theme in Magento2.
2. How to install Magento 2 theme via Composer?
If a new theme is presented as a composer package, you will need to install it using composer. Themes loaded through Composer are located in the vendor/ directory and can be stored anywhere in root.
The installation process of a theme using Composer is the same as for any other third-party extension.
Here are the general steps you should complete:
-
- Step 1: Select the theme
- Step 2: Install theme
- Step 3: Apply the theme
Lets get started….
Step 1: Select the theme
In this step, we will select the theme which is compatible with the installed Magento version and business need. you can purchase a theme from Magento Marketplace or from a provider whose themes support composer;
If you are learning then there are free theme available on the marketplace. You can choose from it.
Step 2: Install theme via composer
Once your theme is selected, then its time to install it. Please enter to your Magento root directory and enter the command:
composer require <vendor>/<name>:<version>
Then run below command to update the project dependencies.-
composer update
Wait till dependencies are updated;
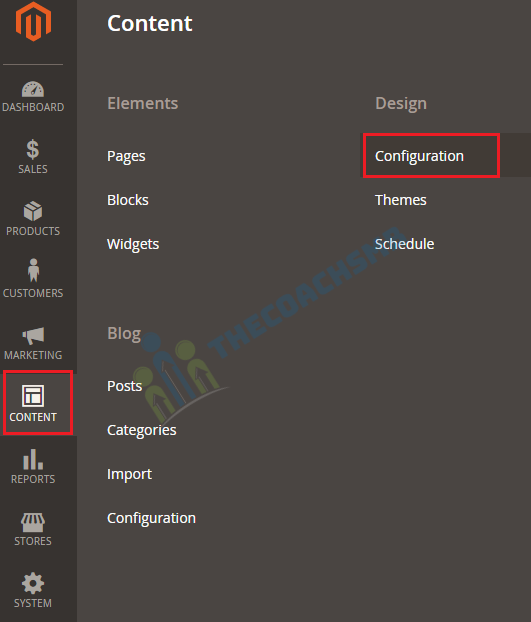
Make sure the theme is registered. For this open the Admin Panel or reload any of the backend pages after it’s installed. Then navigate to Content>Design>Themes and check the theme is displayed on the right panel in the list of available themes.
Step 3: Apply the theme
After the successful installation on the theme, apply the theme in the Admin Panel. Go to Login to Magento Admin -> Content->Design->Configuration.
In Applied Theme, select your installed theme. Click on the “Save Configuration” button.
First, upgrade the setup by running this command:
php bin/magento setup:upgrade
Deploy the static content by running this command:
php bin/magento setup:static-content:deploy
and clear the cache
php bin/magento cache:flush
refresh the browser. Your Magento is ready with new look.
You can watch the complete installation of the third party theme practically in the below video.