-
May, Mon, 2022

How to add modal popup in Magento 2
Today, I would like to talk about modal popup. Magento 2 has a great built in possibility to easily add a popup to any place on your page. Let me quickly go through all the necessary files. I will provide you with two examples from my real tasks as it is really likely you will have similar tasks to implement.
First of all, I would like to encourage you to check out the Modal Widgets Magento 2 Documentation first. Then I am happy to share with you all the necessary code that you will need to add to your project. I will provide you with two examples and I will focus on a case where we will add modal popup which opens after clicking a link in Magento 2 project.
How to add modal popup to standard Magento 2 parts?
Let’s start with a case where we will add a link into the footer in order to add modal popup in our Magento 2 project after clicking the link.
Template
First of all, let’s add the necessary templates to our module or theme. They will be located in vendor/vendor-name/module-name/view/frontend/templates/ or vendor/vendor-name/theme-name/module-name/templates/ where “vendor-name“, “theme-name” and “module-name” needs to be replaced with your name of vendor, theme and module name. If you are not creating a new module, you can use Magento_Theme module for this case.
In our example, we will create two phtml files. One file will be to display a link, another file will be to hold a static block. The content of our popup will be added into the static block, but you can also add it directly to the template. Theoretically we could create just one phtml file with the link and popup content, however I look at the problem from a bigger perspective. Maybe at some point we will want to open the popup automatically without clicking the link, or open the popup by clicking another link on the page. In order to make it more general I will create two phtml files.
note.phtml
First of all we need to add a template with our link. Let’s create note.phtml file in your theme or module as mentioned above.
Solution 1
<div class="note">
   <a class="action popup-open" href="#">
       <span><?php echo __('Please, click to open popup') ?></span>
   </a>
</div>
<?php echo $this->getChildHtml('popup') ?>
<script type="text/x-magento-init">
{
   ".popup-open": {
       "Vendor_ModuleName/js/popup": {}
   }
}
</script>
Let’s focus for a while on each part of this code.
<div class="note">
   <a class="action popup-open" href="#">
    <span><?php echo __('Please, click to open popup') ?></span>
   </a>
</div>
<?php echo $this->getChildHtml('popup') ?>
<script type="text/x-magento-init">
{
   ".popup-open": {
    "VendorName_ModuleName/js/popup": {}
   }
}
</script>
In this part we execute our script. Notice, we use the class of the link “popup-open” and we point to the js file with the name of “popup.js” in the path “VendorName_ModuleName/js”, of course, you need to replace “VendorName” and “ModuleName” with your custom names.
Solution 2
<div class="note">
   <a class="action popup-open" data-mage-init='{"VendorName_ModuleName/js/popup":{}}' href="#">
     <span><?php echo __('Please, click to open popup') ?></span>
   </a>
</div>
<?php echo $this->getChildHtml('popup') ?>
In the Solution 2 we use a different way of initialising the script.
<a class="action popup-open" data-mage-init='{"VendorName_ModuleName/js/popup":{}}' href="#">
   <span><?php echo __('Please, click to open popup') ?></span>
</a>
As you can see we don’t have a <script> tag anymore, instead we have data-mage-init='{"VendorName_ModuleName/js/popup":{}}' where you need to replace “VendorName” and “ModuleName” with your custom names.
What is the different between these two solutions?
In Solution 1 the script will be initialised on all elements with class “popup-open” where in the Solution 2 it will be initialised only on this element.
popup.phtml
At this point I am adding an additional template to point to the static block. Why have I added another template instead of executing the static block directly? I already explained at the beginning of this post.
<div id="popup" style="display: none;">
   <?php echo $this->getChildHtml('popup-content') ?>
</div>
In this case, “popup” is the id of the block that I will use later on and “popup-content” is the static block name that I will set in my xml file later on.
Layout
Our xml files will be added to vendor/vendor-name/module-name/view/frontend/layout/ or vendor/vendor-name/theme-name/module-name/layout/ where “vendor-name“, “theme-name” and “module-name” needs to be replaced with your name of vendor, theme and module name. If you are not creating a new module, you can use Magento_Theme module for this case.
default.xml
As we are adding the link to the footer, I will use default.xml file to add my templates, however feel free to add it to any place on the page as I mentioned earlier.
<?xml version="1.0"?>
<page xmlns:xsi="http://www.w3.org/2001/XMLSchema-instance" xsi:noNamespaceSchemaLocation="urn:magento:framework:View/Layout/etc/page_configuration.xsd">
    <body>
        <referenceContainer name="footer">
            <block class="Magento\Framework\View\Element\Template" name="note-popup" as="note-popup" template="VendorName_ModuleName::note.phtml" after="-">
                <block class="Magento\Framework\View\Element\Template" name="popup" as="popup" template="VendorName_ModuleName::popup.phtml" after="-">
                    <block class="Magento\Cms\Block\Block" name="popup-content">
                        <arguments>
                            <argument name="block_id" xsi:type="string">popup-content</argument>
                        </arguments>
                    </block>
                </block>
            </block>
        </referenceContainer>
    </body>
</page>
Javascript
Our last step will be to add a javascript file to our script. Our js file will be added to vendor/vendor-name/module-name/view/frontend/web/js/ or vendor/vendor-name/theme-name/module-name/web/js/ where “vendor-name“, “theme-name” and “module-name” needs to be replaced with your name of vendor, theme and module name. If you are not creating a new module, you can use Magento_Theme module for this case.
popup.js
Let’s create a popup.js file where we will write code with our popup script.
;define(
   [
     'jquery',
     'Magento_Ui/js/modal/modal'
   ],
   function($) {
      "use strict";
      //creating jquery widget
      $.widget('VendorName.Popup', {
         options: {
            modalForm: '#popup',
            modalButton: '.popup-open'
         },
         _create: function() {
             this.options.modalOption = this.getModalOptions();
             this._bind();
         },
         getModalOptions: function() {
             /** * Modal options */
             var options = {
               type: 'popup',
               responsive: true,
               clickableOverlay: false,
               title: $.mage.__('PopUp'),
               modalClass: 'popup',
               buttons: [{
                  text: $.mage.__('Yes, I got you!'),
                  class: '',
                  click: function () {
                     this.closeModal();
                  }
               }]
             };
             return options;
         },
          _bind: function(){
             var modalOption = this.options.modalOption;
             var modalForm = this.options.modalForm;
             $(document).on('click', this.options.modalButton, function(){
                $(modalForm).modal(modalOption);
                $(modalForm).trigger('openModal');
             });
          }
      });

      return $.VendorName.Popup;
   }
);
Notice that in the script I use “popup” id of the popup content which is added to popup.phtml file and I use “popup-open” which is the class of the link in link.phtml file. Moreover, remember to replace “VendorName” with your own custom name.
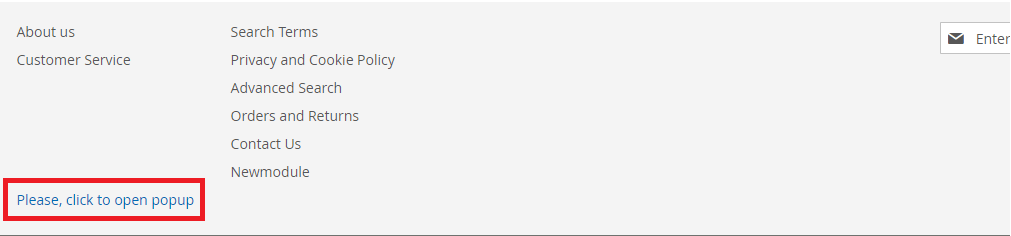
you will see the link in the footer as shown below. On click on that link, poup will open.
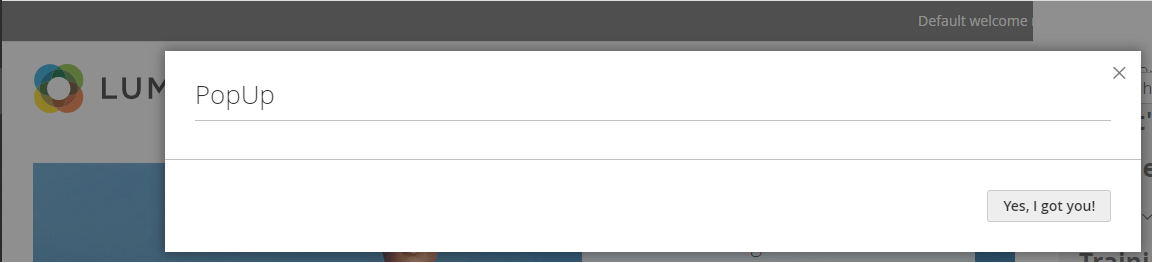
Popup As below:
How to add modal popup to knockout.js part in Magento 2?
Let’s focus on the example where you need to add a link just before the Place Order button and add modal popup to the checkout in Magento 2. As you should know, checkout uses knockout.js and the implementation is slightly different here.
Template
In this case we will keep our popup.phtml file from the previous example, we will just add it in in a slightly different way into the xml file. However, before you continue, make sure you have added popup.phtml as mentioned above.
Our second file will be located in a different place, which is vendor/vendor-name/module-name/view/frontend/web/template/ or vendor/vendor-name/theme-name/module-name/web/template/ where “vendor-name“, “theme-name” and “module-name” needs to be replaced with your name of vendor, theme and module name. If you are not creating a new module, you can use Magento_Checkout module for this case as we make the implementation into the checkout part.
note.html
Another file mentioned above will be note.html which has a similar structure to note.phtml.
<div class="note">
    <a class="action popup-open"data-bind="mageInit: {'VendorName_ModuleName/js/popup':{}}" href="#">
        <span><!-- ko i18n: 'Please, click to open popup.'--><!-- /ko --></span>
    </a>
</div>
Again, we use the class of the link “popup-open“. I also initialised our script by data-bind calling our script popup.js, really similar to Solution 2 in the previous example.
Layout
Our xml file, as in the previous example, will be added to vendor/vendor-name/module-name/view/frontend/layout/ or vendor/vendor-name/theme-name/module-name/layout/ where “vendor-name“, “theme-name” and “module-name” needs to be replaced with your name of vendor, theme and module name. If you are not creating a new module, you can use Magento_Checkout module for this case as we make the implementation into the checkout part.
checkout_index_index.xml
In this case, we will use checkout_index_index.xml as we will focus on adding a popup to the checkout. If you are familiar with this file, you know that it is slightly different than the rest of the xml files.
<?xml version="1.0"?>
<page xmlns:xsi="http://www.w3.org/2001/XMLSchema-instance" layout="1column" xsi:noNamespaceSchemaLocation="urn:magento:framework:View/Layout/etc/page_configuration.xsd">
    <body>
        <referenceBlock name="checkout.root">
            <arguments>
                <argument name="jsLayout" xsi:type="array">
                    <item name="components" xsi:type="array">
                        <item name="checkout" xsi:type="array">
                            <item name="children" xsi:type="array">
                                <item name="steps" xsi:type="array">
                                    <item name="children" xsi:type="array">
                                        <item name="billing-step" xsi:type="array">
                                            <item name="children" xsi:type="array">
                                                <item name="payment" xsi:type="array">
                                                    <item name="children" xsi:type="array">
                                                        <item name="payments-list" xsi:type="array">
                                                            <item name="children" xsi:type="array">
                                                                <item name="order-comment" xsi:type="array">
                                                                    <item name="component" xsi:type="string">VendorName_ModuleName/js/checkout-popup-note</item>
                                                                    <item name="displayArea" xsi:type="string">before-place-order</item>
                                                                    <item name="dataScope" xsi:type="string">checkoutpopup</item>
                                                                    <item name="provider" xsi:type="string">checkoutProvider</item>
                                                                </item>
                                                            </item>
                                                        </item>
                                                    </item>
                                                </item>
                                            </item>
                                        </item>
                                    </item>
                                </item>
                            </item>
                        </item>
                    </item>
                </argument>
            </arguments>
        </referenceBlock>
         <referenceContainer name="footer">
            <block class="Magento\Framework\View\Element\Template" name="popup" as="popup" template="VendorName_ModuleName::popup.phtml" after="-">
                <block class="Magento\Cms\Block\Block" name="popup-content">
                    <arguments>
                        <argument name="block_id" xsi:type="string">popup-content</argument>
                    </arguments>
                </block>
            </block>
        </referenceContainer>
    </body>
</page>
Javascript
In this case, we will keep popup.js from the previous example. Before continuing, make sure you have this file as described in the first example.
Our second js file that is needed to add the note.html file to the checkout will be added to vendor/vendor-name/module-name/view/frontend/web/js/ or vendor/vendor-name/theme-name/module-name/web/js/ where “vendor-name“, “theme-name” and “module-name” needs to be replaced with your name of vendor, theme and module name. If you are not creating a new module, you can use Magento_Checkout module for this case as we make the implementation into the checkout part.
checkout-popup-note.js
;define(
    [
        'ko',
        'jquery',
        'uiComponent'
    ],
    function (ko, $, Component) {
        'use strict';
        return Component.extend({
            defaults: {
                template: 'VendorName_ModuleName/note'
            }
        });
    }
);
In this case, we just add the note.html file.