
-
Jun, Thu, 2021

Install and Configure Grunt in Magento2
Table of Contents
Grunt is a JavaScript task runner which essentially simplifies repetitive tasks by automating compilation, minification, linting, unit testing, etc.
In this article, we are going to understand how to install and configure Grunt for Magento2.
Here are the steps :
Step 1: Install nodejs in our machine
Step 2: Install Grunt CLI
Step 3: Configure In Magento2
Step 4: Grunt configuration file
Let’s start the process..
Step1: Install nodejs in our machine
Grunt and Grunt plugins are installed and managed via npm, the Node.js package manager.
For Windows:-
Install nodejs – https://nodejs.org/en/
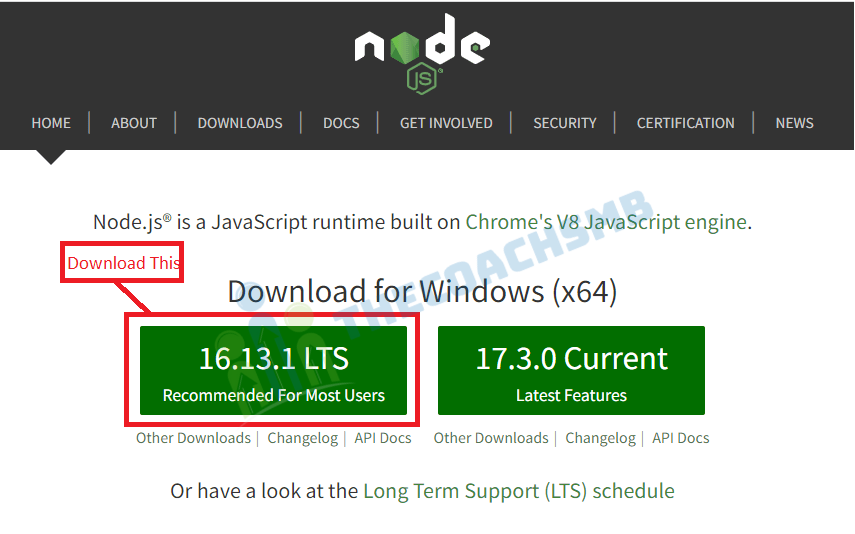
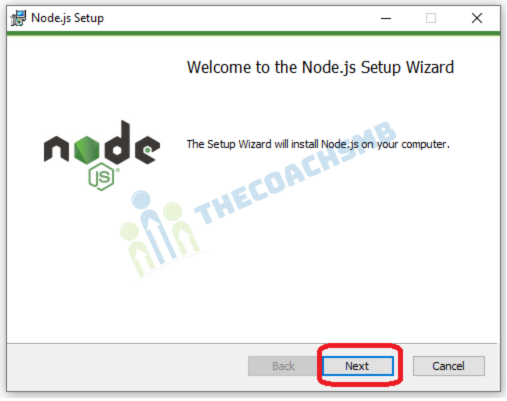
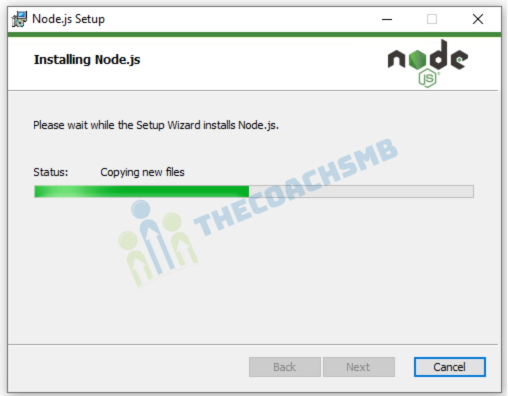
Click to download as shown above. Once download completes, Install it by double clicking on the downloaded file.
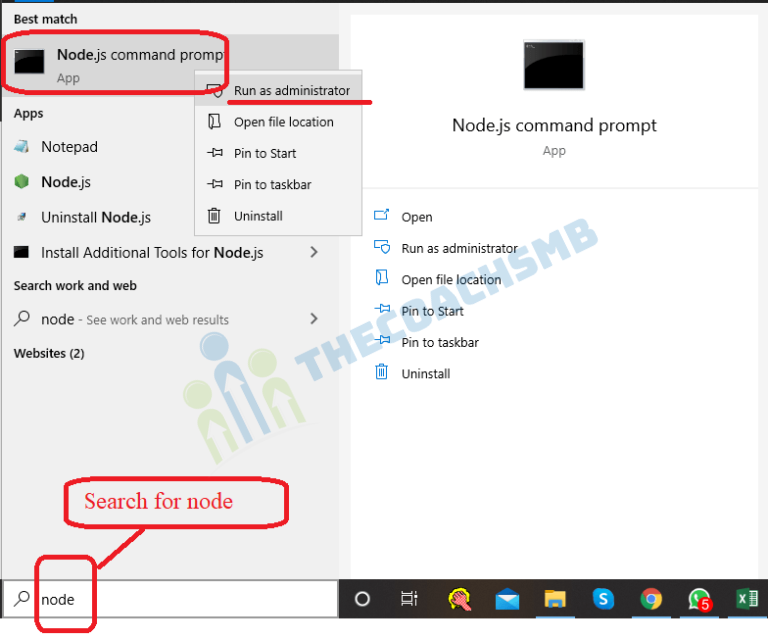
Then in the Windows Search box, type node and open it in “Run as administrator”
node -v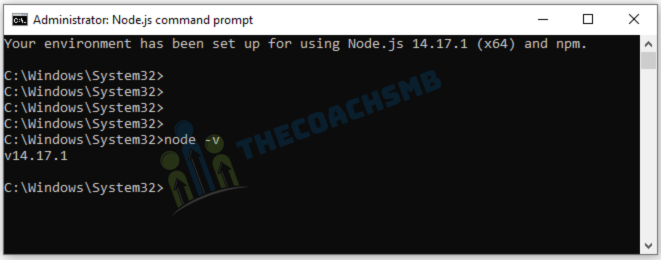
For, Linux / Ubuntu:-
sudo apt-get updatesudo apt-get install nodejsnodejs -vStep 2: Install Grunt CLI
To install Grunt’s command line interface (CLI) globally. You may need to use sudo (for OSX, *nix, BSD etc) or run your command shell as Administrator (for Windows) to do this.
npm install -g grunt-cli This will put the grunt command in your system path, allowing it to be run from any directory.
Step 3: Working with Magento project
To configure project with Grunt, Go to Magento 2 Root Directory to copy and paste the contents of the following sample files:
- From package.json.sample to package.json
- From Gruntfile.js.sample to Gruntfile.js
- From grunt-config.json.sample into grunt-config.json
In a command prompt, run the following commands to refresh or install the node.js project dependency, including Grunt:
cd your_Magento_instance_directory npm install npm update
Step 4: Grunt configuration file
Copy the contents of themes.js into local-themes.js in the dev/tools/grunt/configs/ directory.
If installed as described above, Grunt will use the default configuration files located in the dev/tools/grunt/configs/ directory. You can define your theme in the local-themes.js file. The following shows an example of how you can define your theme.
<theme>: {
      area: '<area>',
      name: '<Vendor>/<theme>,
      locale: '<language>',
      files: [
        '<path_to_file1>', //path to root source file
        '<path_to_file2>'
     ],
 dsl: 'less'
}
Where the following notation is used:
<Vendor>: vendor name.<theme>: your theme code, conventionally should correspond to the theme directory name.<area>: area code, can be eitherfrontendoradminhtml.<language>: specified in thecode_subtagformat, for exampleen_US. Only one locale can be specified here.<path_to_file>: path to the root source file, relative to theapp/design/frontend/<Vendor>/<theme>/webdirectory. You need to specify all root source files of the theme. If your theme [inherits] from a certain theme, and does not contain its own root source files, specify the root source files of the parent theme.
Using custom Grunt configuration files
To use a custom file for Grunt configuration:
Open the grunt-config.json file in the Magento root and set configurations object as follows.
- key: file alias
- value: path to your custom file
Example: If your custom configuration file local-themes.js is located in the <magento_root>/dev/tools/grunt/configs directory, the following is already set in your grunt-config.json:
"themes": "dev/tools/grunt/configs/local-themes.js"
Once these are set correctly, run grunt to watch your changes.
- Run
grunt exec:<theme>from the root directory to republish the symlinks. - Run
grunt watch:<theme>so that grunt will watch for file changes.
Lets take a example to perform these commands:-
Style Changes in Magento 2 Server-Side Compilation Mode via Grunt
- Go to your theme folder,
- Edit the _theme.less file with the following code
@navigation__background: #000;
save the file.
- run below command in the root directory of Magento2
grunt exec: <your_theme>grunt less: <your_theme>- Refresh your browser and check the changes.
Uses of grunt watch command :-
grunt watch command.- In root directory of Magento2, run the below command
grunt watch
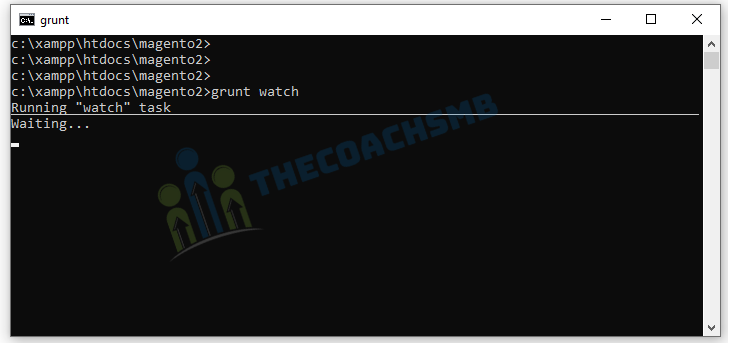
So this command is watching for the changes in the less file. So lets make change in the _theme.less file. Lets change the background of the navigation….
- Then Go to your theme folder,
- Edit the _theme.less file with the following code
@navigation__background: @color-blue1;
save the file.
Now file will be executed and compiles automatically on the server.
- Refresh the page once more to view the changes.
Magento 2 Grunt Commands
Use the Grunt commands described below to perform different customization tasks in your Magento 2 project. All commands should be run from the installation directory of Magento 2.
- grunt clean:<theme>. This command removes static files related to your theme in both pub/static and var directories.
- grunt exec:<theme>. This one republishes source files symlinks to pub/static/frontend/<Vendor>/<theme>/<locale>.
- grunt less:<theme> should be used to compile .css files using symlinks from the aforementioned directory.
- grunt watch. This command is designed for the LiveReload extension. It tracks changes in the source files, recompiles .css files and reloads browser pages.