
No products in the cart.
- Published: Jun 10, 2026 | Updated: Sep 27, 2026

How to Install Magento 2.4.9 on Ubuntu 24.04 LTS — Complete Installation Guide
Table of Contents
Introduction
Magento Open Source 2.4.9 is the latest Magento release and introduces updated platform requirements, including PHP 8.5, OpenSearch 3, Composer 2.10, and MariaDB 12.3.
In this step-by-step guide, you will learn how to install Magento 2.4.9 on Ubuntu 24.04 LTS from scratch, including the server configuration required to get Magento running successfully.
We will configure the required server environment, install Magento, and verify that the store is working correctly.
Magento 2.4.9 System Requirements
Before starting the installation, let’s review the server environment and software versions used in this Magento 2.4.9 installation.
🖥️
Ubuntu 24.04 LTS
Server operating system
🌐
Nginx 1.30
Web server for Magento
🐘
PHP 8.5
PHP runtime and required extensions
🗄️
MariaDB 12.3
Magento database server
🔎
OpenSearch 3
Search engine for Magento
📦
Composer 2.10
PHP dependency manager
The versions above are used throughout this installation guide. For the complete compatibility matrix and additional system requirements, see our Magento 2.4.9 System Requirements & Compatibility Guide.
Goal:
By the end of this guide, these components will be configured and Magento 2.4.9 will be ready to run on your Ubuntu 24.04 LTS server.
Step 1: Update Ubuntu 24.04 LTS
Before installing the Magento 2.4.9 dependencies, update the Ubuntu package lists and upgrade the existing packages on your server. This helps ensure that you are working with the latest available security updates and package versions.
First, connect to your Ubuntu 24.04 LTS server using SSH.
Then run the following commands:
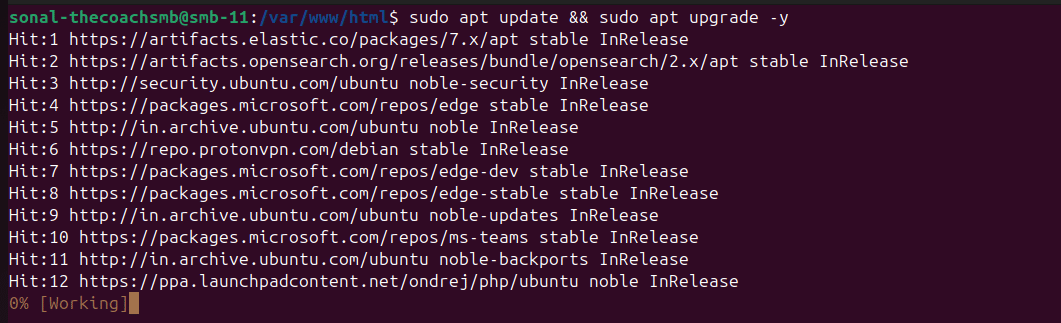
sudo apt update && sudo apt upgrade -y
Tip:
If the system asks you to restart services or reboot the server after the upgrade, complete the restart before continuing with the Magento installation.
Verify the Ubuntu Version
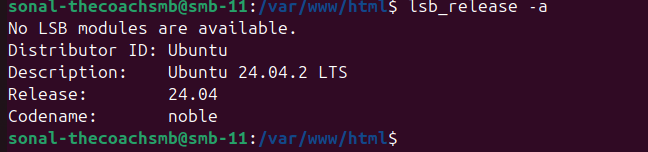
Before continuing, verify that your server is running Ubuntu 24.04 LTS. Run the following command:
lsb_release -aYou should see output similar to:
Important:
This guide is specifically written for Ubuntu 24.04 LTS. If you are using a different Ubuntu version, some package versions or installation steps may differ.
Step 2: Install Nginx
Nginx is the web server that will handle requests to your Magento 2.4.9 store. In this guide, we will use the Nginx 1.30 stable branch and configure it to work with Magento and PHP-FPM.
Important:
Ubuntu 24.04 may provide an older Nginx version through its default package repository. Since the Magento 2.4.9 system requirements list the Nginx 1.30 branch, this guide uses the official Nginx repository.
Install Required Packages
Install the packages required to add and verify the official Nginx repository:
sudo apt update
sudo apt install curl gnupg2 ca-certificates lsb-release ubuntu-keyring -y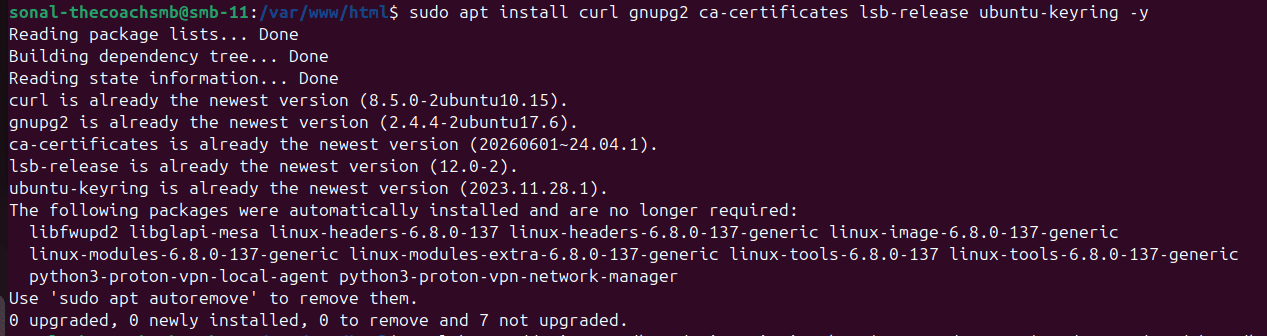
Add the Nginx Signing Key
Download and install the official Nginx repository signing key:
curl https://nginx.org/keys/nginx_signing.key | gpg --dearmor | sudo tee /usr/share/keyrings/nginx-archive-keyring.gpg >/dev/null
Add the Official Nginx Repository
Add the official Nginx repository for Ubuntu 24.04:
echo "deb [signed-by=/usr/share/keyrings/nginx-archive-keyring.gpg] https://nginx.org/packages/ubuntu `lsb_release -cs` nginx" | sudo tee /etc/apt/sources.list.d/nginx.list
Set Repository Priority
Configure APT to prefer packages from the official Nginx repository:
echo -e "Package: *\nPin: origin nginx.org\nPin: release o=nginx\nPin-Priority: 900\n" | sudo tee /etc/apt/preferences.d/99nginx
Install Nginx
Update the package lists and install Nginx:
sudo apt update
sudo apt install nginx -y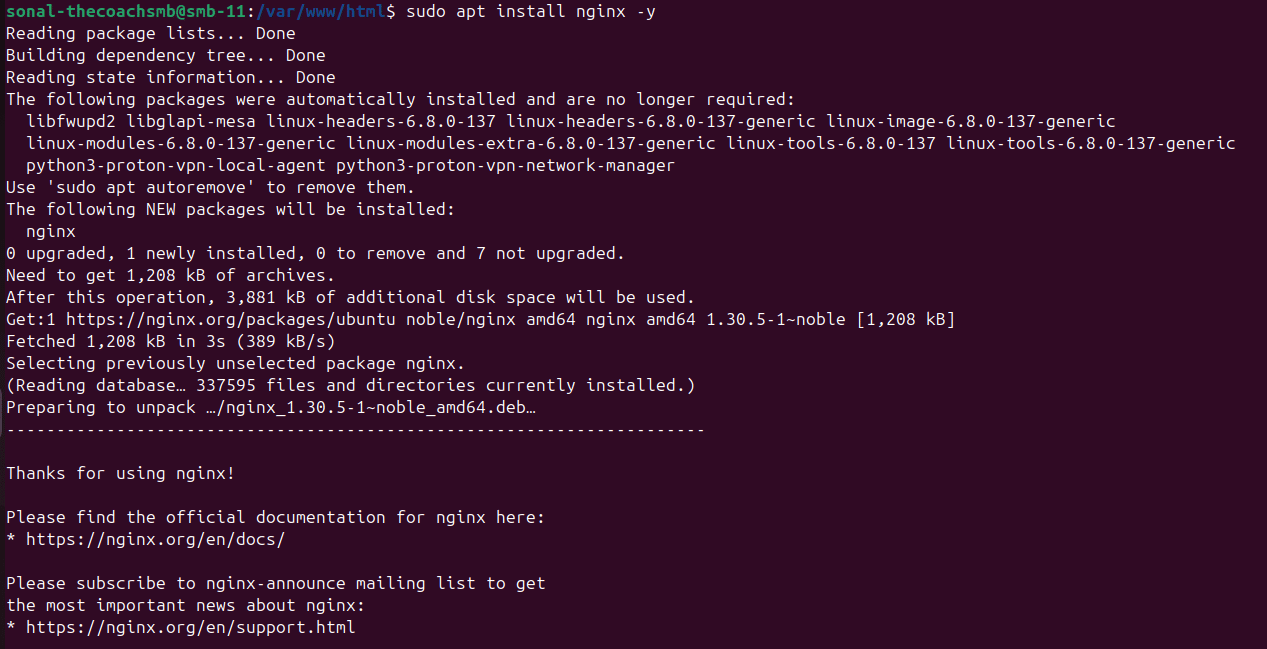
Verify the Nginx Version
Check the installed Nginx version:
nginx -vYou should see an Nginx 1.30.x version:

Check the Nginx Service
Verify that Nginx is running:
sudo systemctl status nginxLook for: Active: active (running)
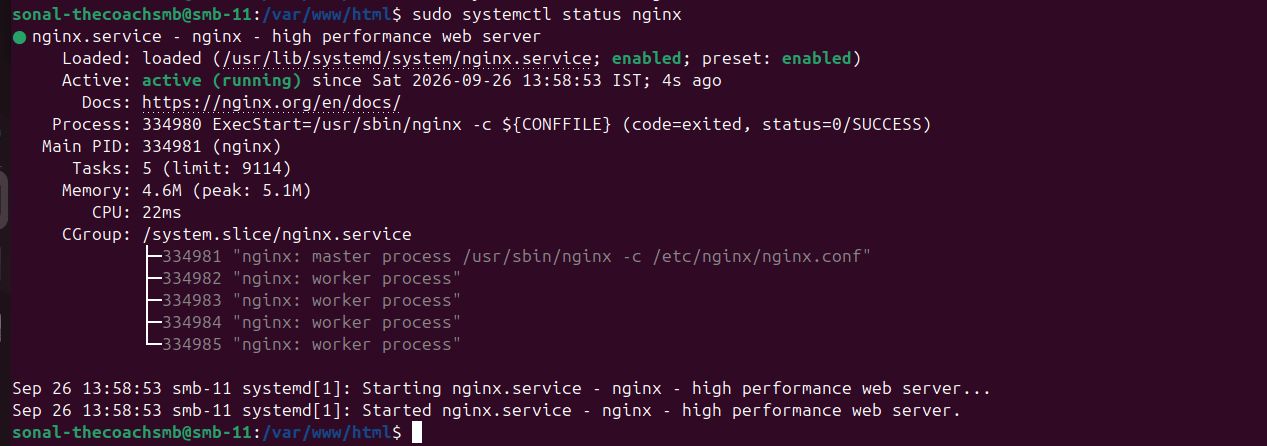
If Nginx is running correctly, press Q to exit the status screen.
Enable Nginx at Boot
Enable Nginx to start automatically whenever the server reboots:
sudo systemctl enable nginx
Next:
Nginx is now installed and running. In the next step, we will install PHP 8.5 and the PHP extensions required by Magento 2.4.9.
Alternative: Install Apache
This guide uses Nginx as the web server.
However, if you already use Apache on your Ubuntu server and want to continue with Apache, you can use the following steps instead.
Install Apache
Install Apache using the following command:
sudo apt install apache2 -y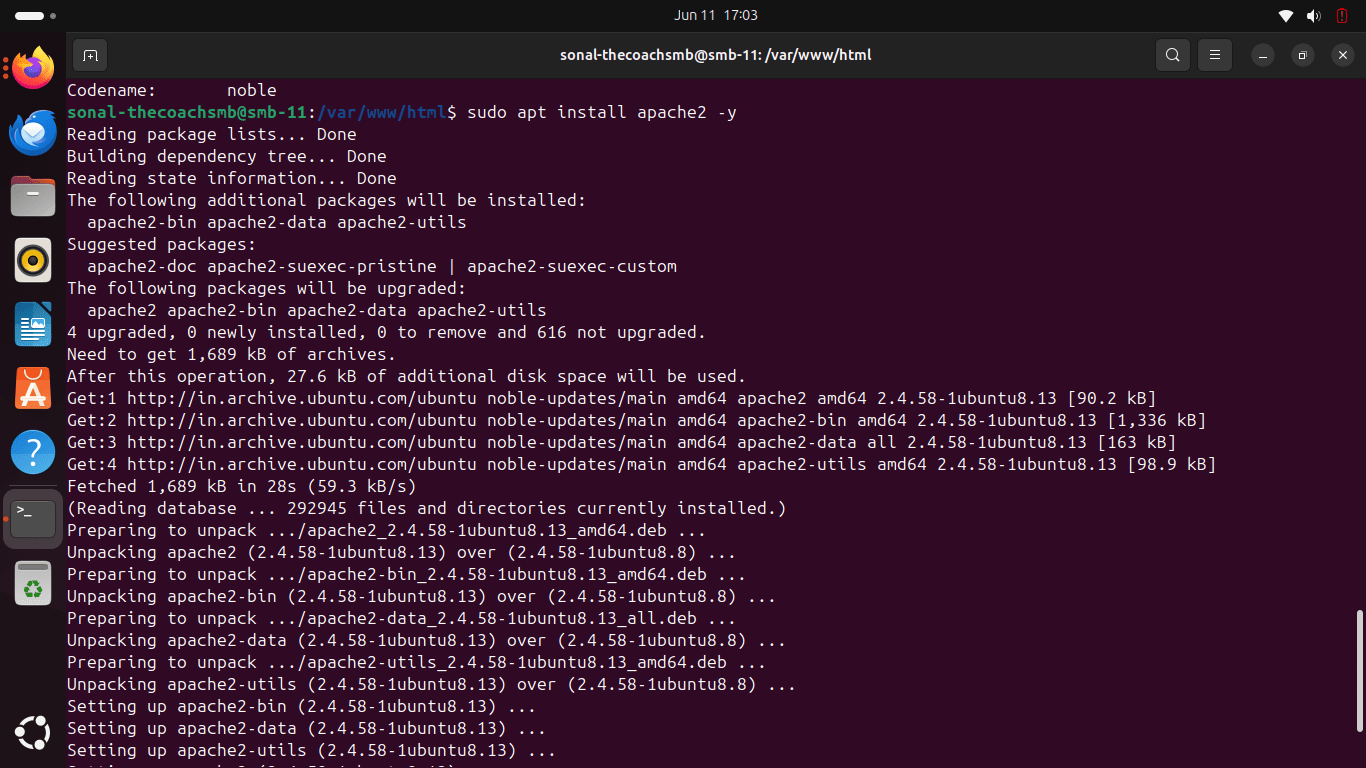
Enable Apache
Enable Apache to start automatically when the server boots:
sudo systemctl enable apache2
Start the Apache service:
sudo systemctl start apache2Verify Apache
Check that Apache is running correctly:
sudo systemctl status apache2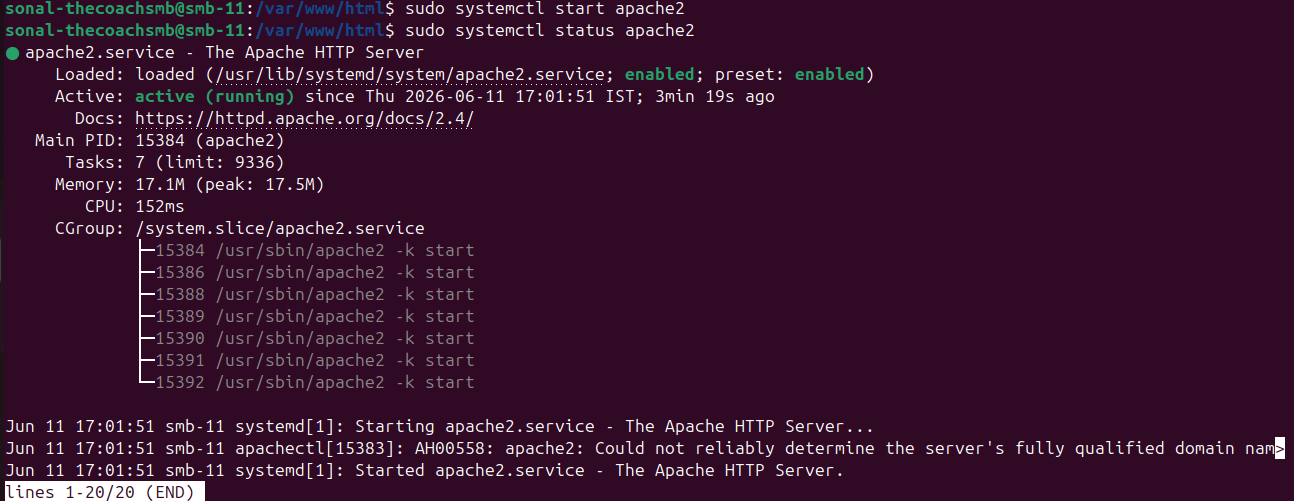
Note:
If you choose Apache instead of Nginx, do not install and run both web servers on the same ports. Continue with the Apache-specific configuration for the remaining Magento setup steps.
Step 3: Install PHP 8.5
Magento 2.4.9 requires PHP 8.5. In this step, we will verify the existing PHP installation first and install PHP 8.5 only when it is required.
Important — Check Before Installing
Do not run the installation commands in this section blindly. If PHP is already installed on the server or local machine, changing or replacing the PHP version can affect other websites and applications running on the same server.
This guide assumes a fresh Ubuntu 24.04 server dedicated to Magento. If the server is already hosting other applications, review the existing PHP configuration before making any changes.
1. Check the Existing PHP Version
First, check whether PHP is already installed:
php -vNow follow the appropriate path below:
- If PHP 8.5 is already active: do not install PHP again. Continue to Verify PHP Extensions below.
- If another PHP version is active: do not immediately change it. First check whether the server
is being used by other websites or applications. - If PHP is not installed: continue with the installation steps below.
For this tutorial:
The installation below is being performed on a fresh Ubuntu 24.04 environment dedicated to Magento. If you are working on an existing production server, do not follow the installation commands without first checking the applications that depend on the current PHP version.
2. Install PHP 8.5
If PHP 8.5 is not already installed, we will add the PHP repository and install PHP 8.5 together with PHP-FPM and the extensions required for Magento 2.4.9.
Add the PHP Repository
Ubuntu’s default repositories may not provide the PHP version required for this guide. We will use the Ondřej Surý PHP PPA to install PHP 8.5.
sudo add-apt-repository ppa:ondrej/php -y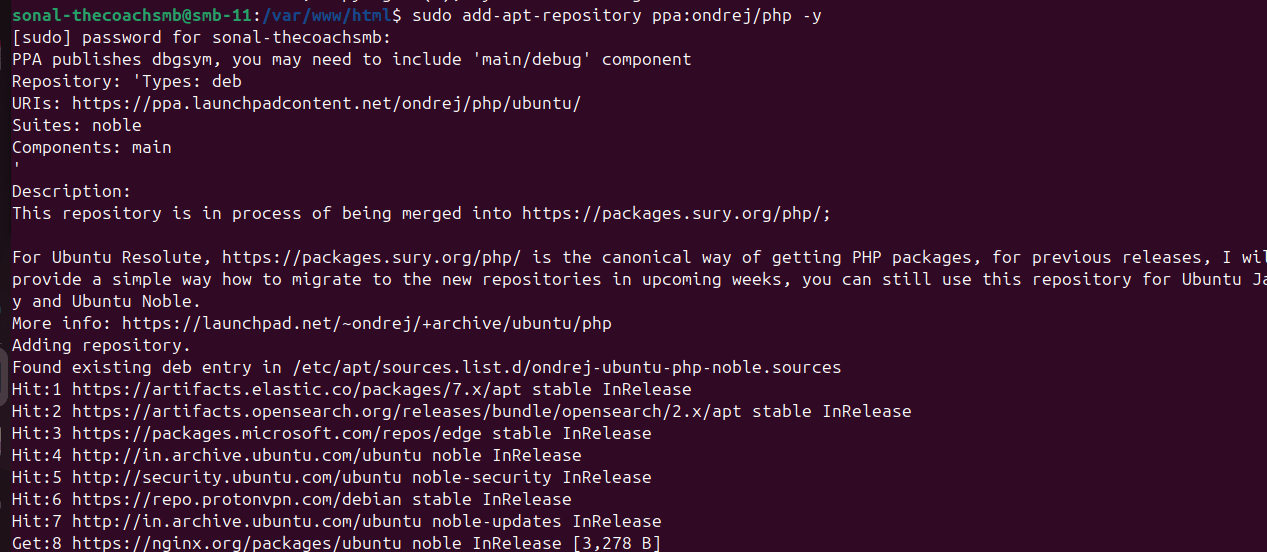
Update the package lists:
sudo apt updateInstall PHP 8.5 and Required Extensions
Install PHP 8.5, PHP-FPM, and the PHP extensions required by Magento:
sudo apt install php8.5 \
php8.5-cli \
php8.5-common \
php8.5-fpm \
php8.5-mysql \
php8.5-curl \
php8.5-gd \
php8.5-intl \
php8.5-bcmath \
php8.5-soap \
php8.5-xml \
php8.5-mbstring \
php8.5-zip \
php8.5-xsl \
php8.5-sockets -y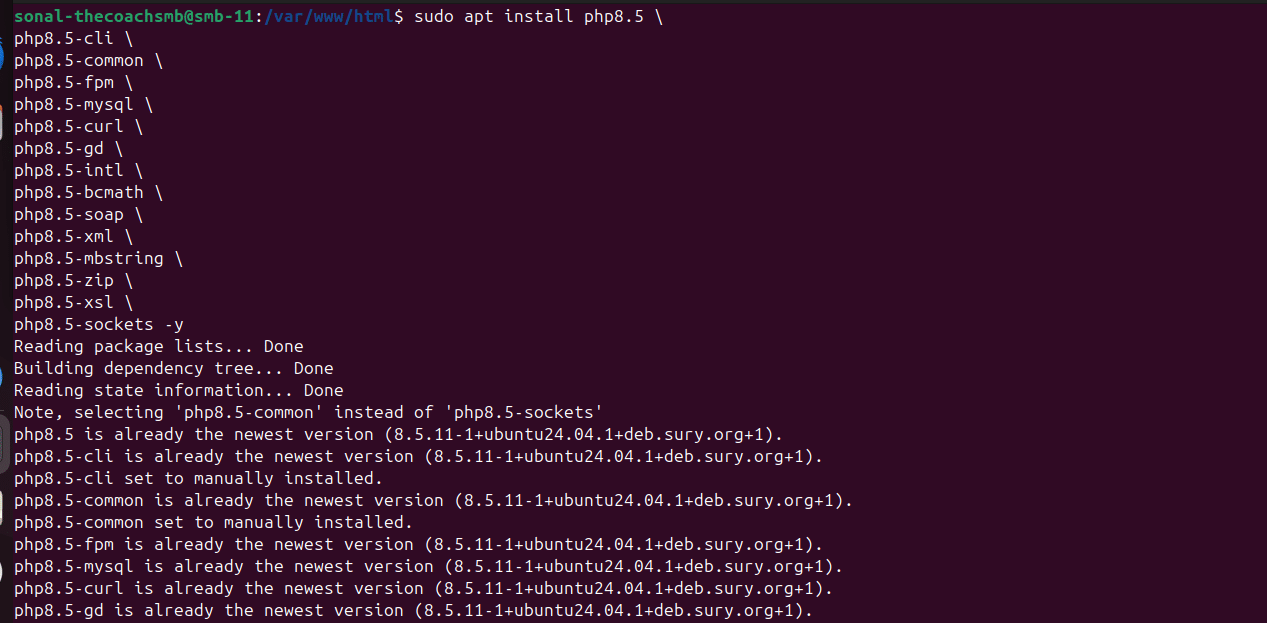
3. Set PHP 8.5 as the Default CLI Version
This step is required only if multiple PHP versions are installed and the command-line PHP is not using PHP 8.5.
First, check the active PHP version:
php -vIf the output shows PHP 8.5, you do not need to change anything. Continue to the next section/step.
If another PHP version is active, check which PHP versions are installed:
ls /etc/php/If PHP 8.5 is available, select it as the default CLI version:
sudo update-alternatives --config php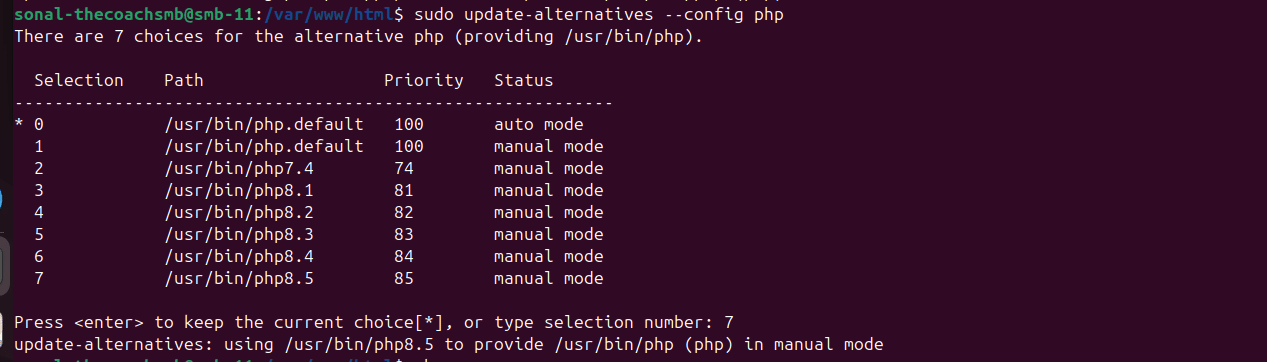
Select the option corresponding to PHP 8.5. Then verify the active version:
php -vImportant:
Changing the default PHP CLI version does not automatically change the PHP version used by other websites on the server. If this is an existing server, review its PHP-FPM pools and web-server configuration before
making changes.
4. Verify the PHP Version
Check the active PHP CLI version:
php -vYou should see PHP 8.5 in the output:

5. Verify PHP-FPM
Magento running behind Nginx uses PHP-FPM to process PHP requests.
Verify that PHP 8.5-FPM is running:
sudo systemctl status php8.5-fpmLook for: Active: active (running)
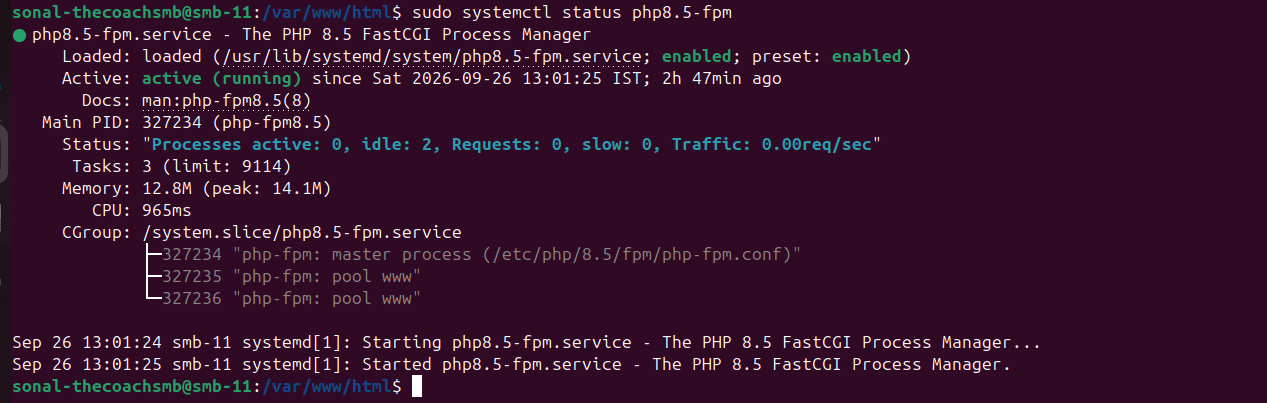
If PHP-FPM is already running, no further action is required.
If it is not running, start the service:
sudo systemctl start php8.5-fpmThen enable it to start automatically after a server reboot:
sudo systemctl enable php8.5-fpm
PHP setup complete.
PHP 8.5 and PHP-FPM have been installed and verified. In the next step, we will install and configure the MariaDB database server for Magento 2.4.9.
Step 4: Install MariaDB 12.3
Magento 2.4.9 supports MariaDB 12.3. In this step, we will first check whether a database server is already installed. MariaDB 12.3 will only be installed when it is actually required.
Important — Check Before Installing
Do not install, remove, replace, or upgrade MariaDB/MySQL blindly. An existing database server may contain databases used by other websites or applications on the server.
This tutorial assumes a fresh Ubuntu 24.04 server dedicated to Magento. If you are working on an existing server, first identify the database server and the applications using it before making any changes.
1. Check Whether MariaDB or MySQL Is Already Installed
First, check whether MariaDB or MySQL is already available:
mariadb --versionIf the command is not available, also check for MySQL:
mysql --versionYou can also check whether a database service is currently running:
sudo systemctl status mariadbIf MariaDB is not installed, you may see a message such as:
Unit mariadb.service could not be found.What should you do next?
- MariaDB 12.3 is already installed: Do not reinstall it. Verify the version and continue with the
database configuration. - Another MariaDB version is installed: Do not upgrade or replace it as part of this tutorial without first
checking whether other applications depend on it. - MySQL is installed: Do not install MariaDB over it. MySQL and MariaDB are separate
database server installations and replacing an existing database
server can affect applications and their data. - No MariaDB or MySQL is installed: Continue with the installation steps below.
2. Install MariaDB 12.3
For this guide, we are installing MariaDB 12.3 on a fresh Ubuntu 24.04 LTS server.
Ubuntu’s default repository may provide a different MariaDB release. To install the version required for this Magento 2.4.9 guide, we will use MariaDB’s official repository setup script and explicitly select the MariaDB 12.3 release series.
MariaDB’s official documentation supports configuring a specific release series using the --mariadb-server-version option.
Download the MariaDB Repository Setup Script
curl -LsSO https://r.mariadb.com/downloads/mariadb_repo_setupMake the script executable:
chmod +x mariadb_repo_setupConfigure the MariaDB 12.3 Repository
Run the repository setup script and explicitly select MariaDB 12.3:
sudo ./mariadb_repo_setup --mariadb-server-version="mariadb-12.3"This configures the MariaDB repository for the 12.3 release series and updates the package information.
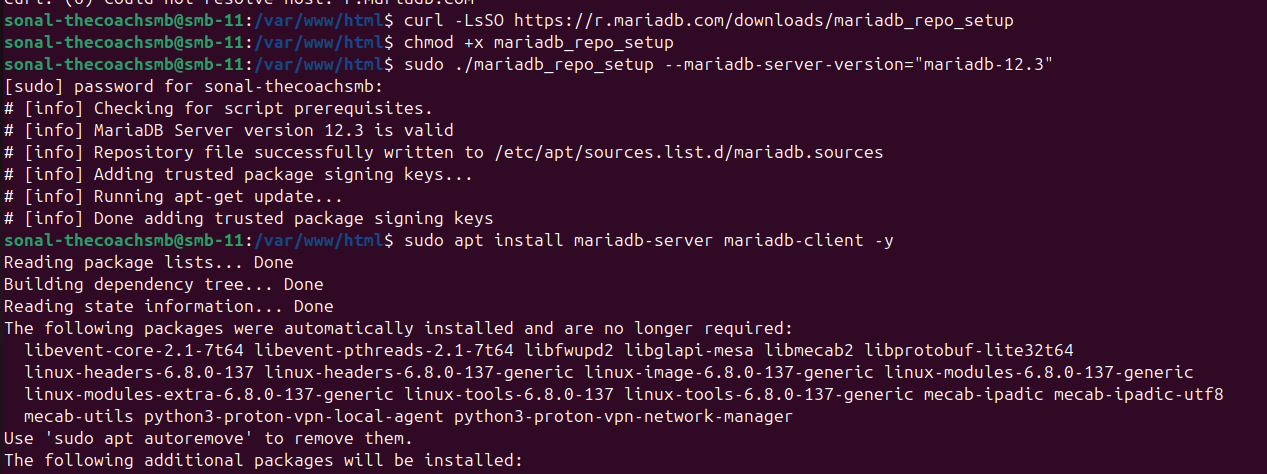
Install MariaDB Server
Now install the MariaDB server and client packages:
sudo apt install mariadb-server mariadb-client -y3. Verify the MariaDB Version
After installation, check the installed MariaDB version:
mariadb --versionYou should see MariaDB 12.3 in the output, for example:
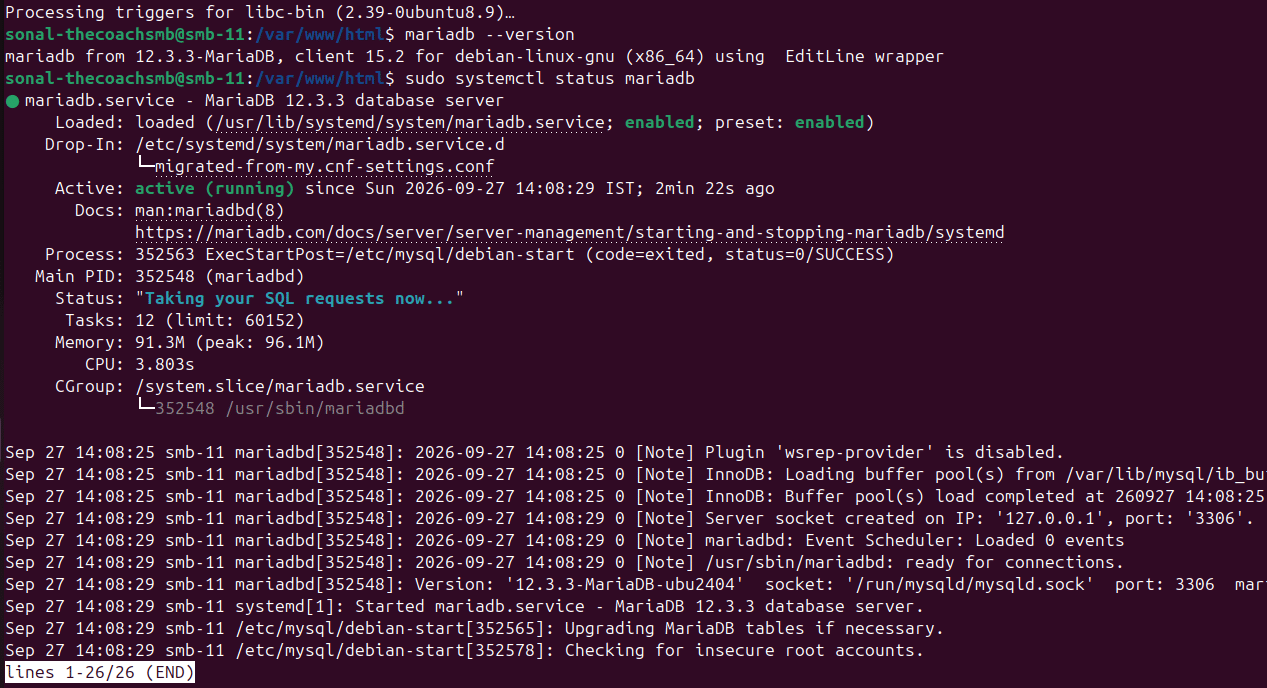
4. Verify the MariaDB Service
Check whether the MariaDB service is running:
sudo systemctl status mariadbLook for: Active: active (running)
If MariaDB is installed but the service is not running, start it:
sudo systemctl start mariadbThen enable MariaDB to start automatically after a server reboot:
sudo systemctl enable mariadb
5. Secure the MariaDB Installation
MariaDB provides a security script that helps remove unnecessary default settings and improve the initial database configuration.
Run:
sudo mariadb-secure-installation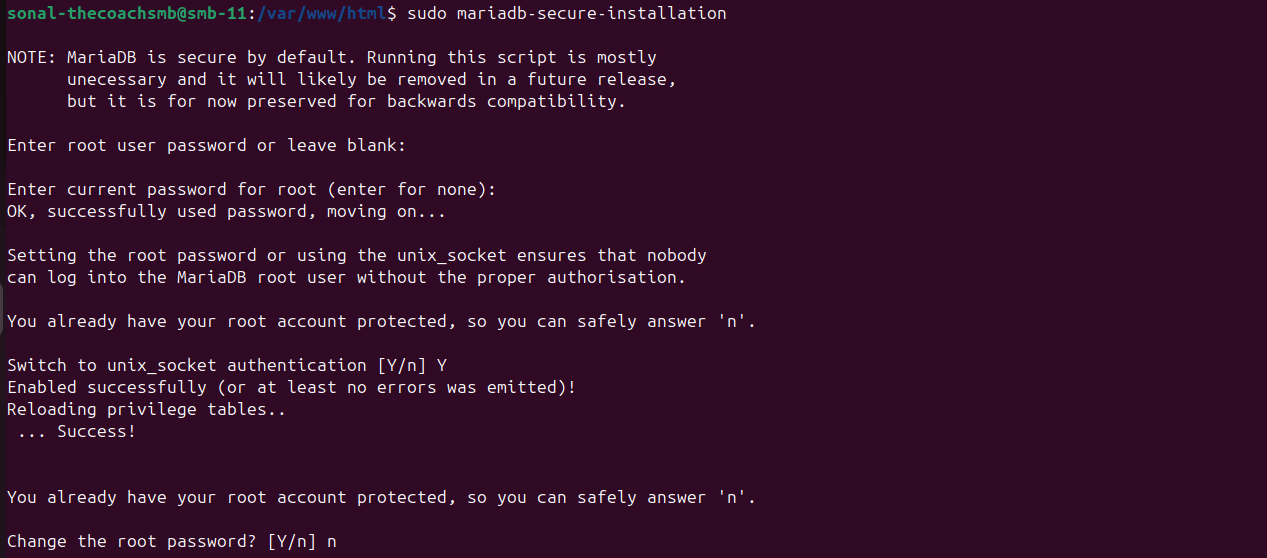
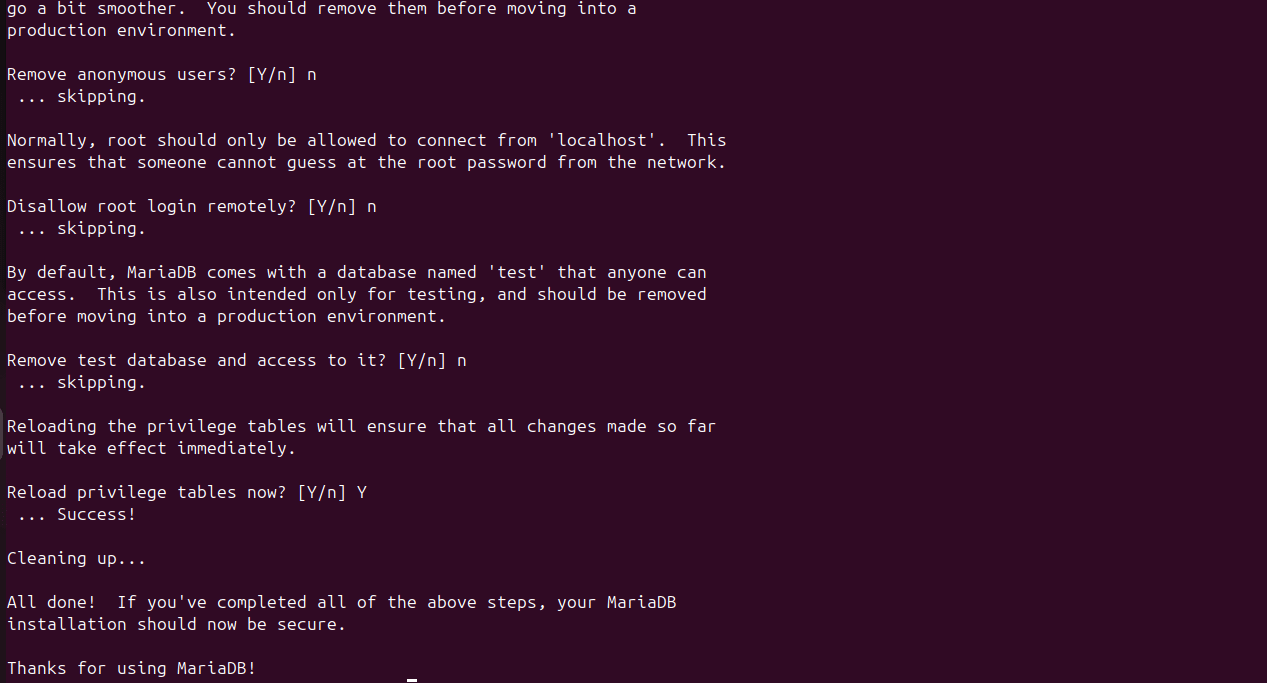
Follow the prompts displayed by the script.
The exact questions can vary depending on the MariaDB version and existing configuration.
Important:
Do not make changes to authentication methods or existing database users on a server that already hosts applications unless you understand how those applications connect to MariaDB.
6. Confirm That MariaDB Is Ready
Finally, connect to MariaDB locally:
sudo mariadbYou should see the MariaDB prompt:
Check the server version
Then exit: EXIT;
MariaDB setup complete.
MariaDB 12.3 has been installed and verified for this Magento 2.4.9 installation. In the next step, we will create the database and database user required by Magento.
Alternative Install MySQL 8.4 (If don’t want to use Maria DB)
Install MySQL:
sudo apt install mysql-server -y
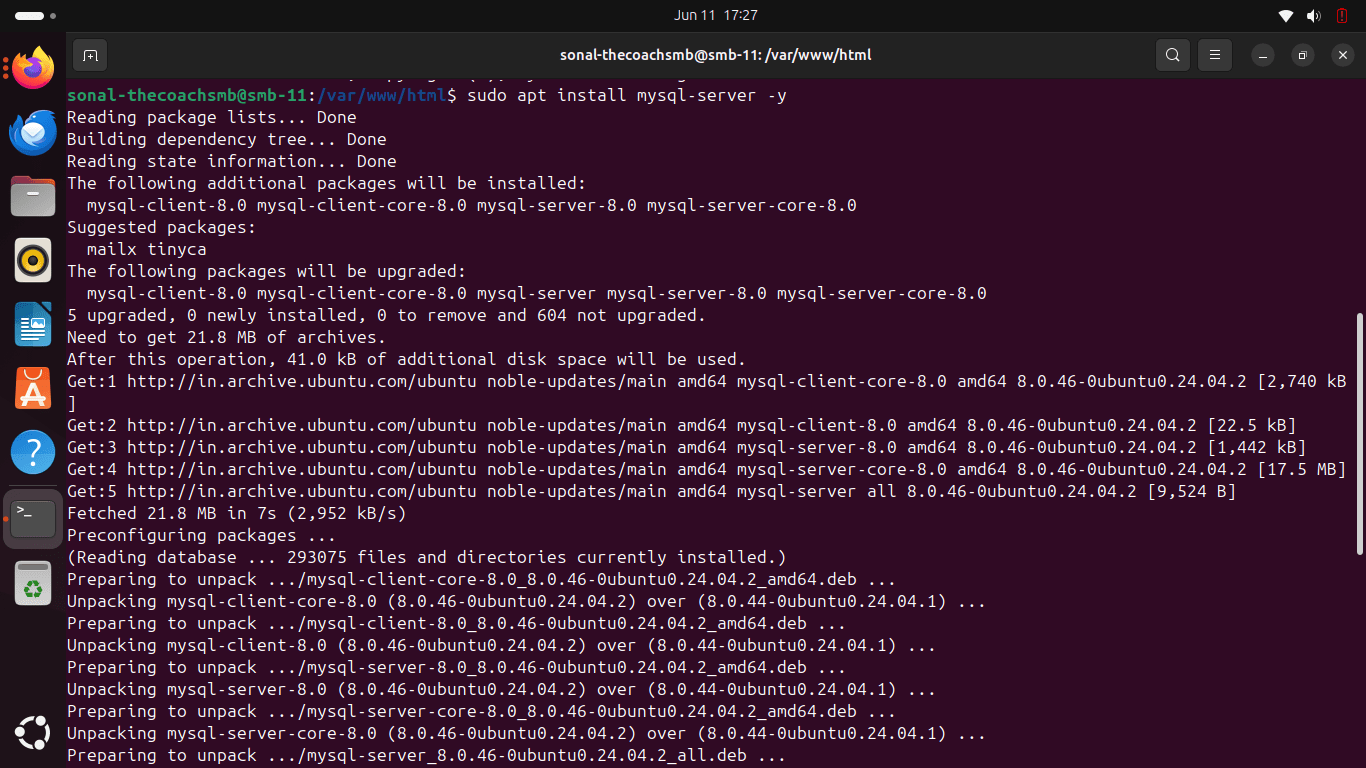
Verify:
mysql --version

Step 5: Create Magento Database
Magento requires a dedicated database and database user to store catalog, customer, order, configuration, and other store data.
In this step, we will create:
- Database: magento
- User: magento_user
- Password: A strong password of your choice
Important:
Use a dedicated database user for Magento. Do not use the MariaDB root account in your Magento configuration.
If this is an existing server, choose a unique database and username and make sure they do not already exist before running the commands below.
1. Open the MariaDB Console
Because we enabled Unix socket authentication for the MariaDB root account, you can access the MariaDB console using:
sudo mariadbYou should see:
MariaDB [(none)]>2. Create the Magento Database
Create a database named magento:
CREATE DATABASE magento;You can verify that the database was created:
SHOW DATABASES;You should see magento in the list.
3. Create a Dedicated Magento Database User
Create a separate database user for Magento:
CREATE USER 'magento_user'@'localhost' IDENTIFIED BY 'YourStrongPasswordHere';Replace the password.
Replace YourStrongPasswordHere with a strong, unique password. Do not use the example password shown above on a real server.
4. Grant Database Permissions
Grant the Magento database user access to the Magento database:
GRANT ALL PRIVILEGES ON magento.* TO 'magento_user'@'localhost';Apply the privilege changes:
FLUSH PRIVILEGES;5. Verify the Magento Database User
You can verify that the user exists:
SELECT User, Host FROM mysql.user WHERE User = 'magento_user';You should see:
magento_user localhost6. Exit MariaDB
Once the database and user have been created, exit the MariaDB console:
EXIT;Database setup complete.
The Magento database and dedicated database user are now ready. Keep the database name, username, and password available because they will be required during the Magento installation.
Alternative For MySQL : Create Magento Database
Configure Password Access for the MySQL Root Account
Login with root user.
sudo mysql
SELECT user,authentication_string,plugin,host FROM mysql.user;
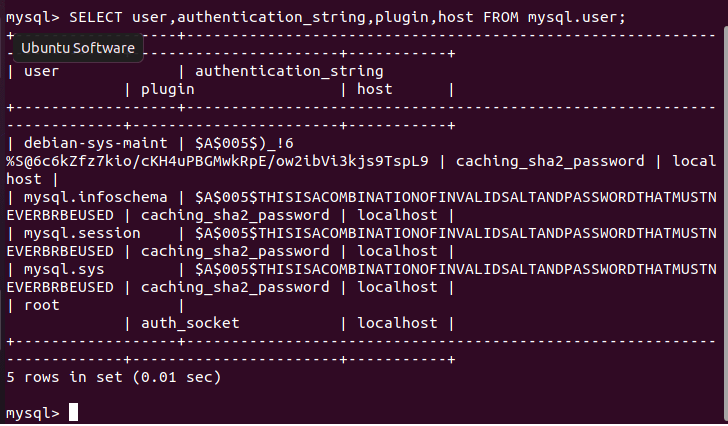
Note: Replace ‘your_secure_password‘ with your password. |
ALTER USER 'root'@'localhost' IDENTIFIED WITH mysql_native_password BY 'your_secure_password';
exit
Step 6: Install OpenSearch 3
Magento 2.4.9 supports OpenSearch 3.
Install OpenSearch following the OpenSearch installation guide.
After installation verify:
curl -X GET http://localhost:9200
Expected output:
{
  "name" : "opensearch-node"
}
Step 7: Install Composer 2.10
Download Composer:
curl -sS https://getcomposer.org/installer | php
Move globally:
sudo mv composer.phar /usr/local/bin/composer
Verify:
composer --version
Step 8: Download Magento 2.4.9
Move to web root:
cd /var/www/html
Install Magento:
composer create-project \
--repository-url=https://repo.magento.com/ \
magento/project-community-edition magento249
Magento Open Source
Enter your Magento Marketplace Public Key and Private Key when prompted.
Step 9: Configure Apache Virtual Host
Create configuration:
sudo nano /etc/apache2/sites-available/magento.conf
Add:
<VirtualHost *:80>
    ServerName magento.local
    DocumentRoot /var/www/html/magento249/pub

    <Directory /var/www/html/magento249/pub>
        AllowOverride All
        Require all granted
    </Directory>
</VirtualHost>
Enable configuration:
sudo a2ensite magento.conf
sudo a2enmod rewrite
sudo systemctl restart apache2
Step 10: Configure Magento Permissions
Navigate to Magento root:
cd /var/www/html/magento249
Set ownership:
sudo chown -R www-data:www-data .
Set permissions:
find var generated vendor pub/static pub/media app/etc -type f -exec chmod g+w {} +
find var generated vendor pub/static pub/media app/etc -type d -exec chmod g+ws {} +
chmod u+x bin/magento
Step 11: Install Magento 2.4.9
Run installation:
php bin/magento setup:install \
--base-url=http://magento.local \
--db-host=localhost \
--db-name=magento \
--db-user=magento_user \
--db-password=StrongPassword123 \
--admin-firstname=Sonal \
--admin-lastname=Admin \
--admin-email=admin@example.com \
--admin-user=admin \
--admin-password=Admin@123456 \
--language=en_US \
--currency=USD \
--timezone=Asia/Kolkata \
--use-rewrites=1 \
--search-engine=opensearch \
--opensearch-host=localhost \
--opensearch-port=9200
Installation may take several minutes.
Step 12: Deploy Static Content
php bin/magento setup:static-content:deploy -f
Step 13: Reindex Magento
php bin/magento indexer:reindex
Step 14: Flush Cache
php bin/magento cache:flush
Verify Magento Installation
Frontend:
http://magento.local
Admin:
http://magento.local/admin
Common Magento Installation Errors
Error: Permission Denied
Fix:
sudo chown -R www-data:www-data /var/www/html/magento249
Error: Missing PHP Extension
Install required extension:
sudo apt install php8.5-xml php8.5-soap php8.5-intl php8.5-gd
Restart Apache:
sudo systemctl restart apache2
Error: Composer Memory Limit
Fix:
php -d memory_limit=-1 /usr/local/bin/composer install
Error: OpenSearch Connection Failed
Verify:
curl http://localhost:9200
Restart OpenSearch service.
Error: Blank Page After Installation
Enable developer mode:
php bin/magento deploy:mode:set developer
Review logs:
tail -f var/log/system.log
What’s New in Magento 2.4.9?
Magento Open Source 2.4.9 introduces:
- PHP 8.5 support
- OpenSearch 3 support
- Symfony 7.4 LTS support
- Composer 2.9 compatibility
- Valkey 9 support
- Improved security and platform stability
- Hundreds of bug fixes and performance enhancements
Conclusion
Magento 2.4.9 is a significant platform update that prepares Magento stores for modern PHP, OpenSearch, and infrastructure requirements. Installing Magento 2.4.9 on Ubuntu 24.04 LTS provides a stable and future-ready development environment.
If you’re planning a Magento upgrade, migration, custom development, performance optimization, or ongoing Magento support, ensure your infrastructure aligns with Magento 2.4.9 requirements from the beginning.
Frequently Asked Questions
Is Ubuntu 24.04 supported for Magento 2.4.9?
Yes. Ubuntu 24.04 LTS is an excellent choice for Magento 2.4.9 deployments.
Does Magento 2.4.9 require OpenSearch?
Yes. OpenSearch is the supported search engine for Magento 2.4.9.
Which PHP version is recommended for Magento 2.4.9?
PHP 8.5 is the latest supported version and recommended for new installations.
Can I install Magento 2.4.9 on localhost?
Yes. Magento can be installed locally for development and testing purposes.
How much RAM is required?
A minimum of 4 GB is required, but 8 GB or more is recommended for smooth development and production performance.